12/13/2022

Snowflake Hugs

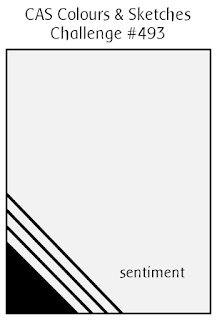
Happy Tuesday!  I'm a bit late posting today - things just got out of control there for awhile this weekend. My card does double duty.  It's for the color challenge at Splitcoaststampers and the seasonal challenge at CAS Colours & Sketches. At CC&S the last challenge of the year is always to take any challenge from the year and make it seasonal.  I chose sketch 497 because I sat out November and didn't create a card for this sketch.


It is also the 500th challenge at CC&S and there are PRIZES from Avery Elle, Lawn Fawn, My Favorite Things and Uniko!  The challenge will remain open until 6:00 pm EST on December 31. We would love for you to play along with us!


The color challenge at SCS this week is Tahitian Tide, Gorgeous Grape and Parakeet Party with sparkle for dessert. Let's just say this easy card took way longer than it should have and I have glitter all over everything in my craft room and guest bath. After exhausting other options to get glittery snowflakes I ended up smearing them with Stickles applied with my fingers.  My dark grey guest towels now have glitter on them from attempting to wash the glitter from my hands.  To add insult to injury, you can't even see it in the photo so I added rhinestones for my "sparkle".  Sigh....

I hope you've enjoyed my card today and will join us in one or both of the challenges!

Products used:

  • Stamps/dies: Stampin' Up! Beautiful Blizzard
  • Ink: Tahitian Tide, Gorgeous Grape and Parakeet Party
  • Accessories: Stickles Star Dust, Rhinestones

Thanks for visiting today!  Follow me on Instagram, Pinterest, Facebook and Bloglovin'

post signature

12/08/2022

Decorating the Tree

Happy Thursday!  I'm the hostess this week at the Tic Tac Toe Challenge.  I hope I have a fun board for you.  When choosing my board elements I decided upon an arctic animal because I know I have so many penguins, polar bears, reindeer, etc. that I could find something to use!


I also wanted to do coloring so I reached for my Stamping Bella stamps. (I've used them all week!) I just love the bear in this - he's so big compared to that tiny penguin. And it also makes me smile because this stamp does something so many other stamp images do - combine a polar bear with a penguin even though one is at the north pole and the other is at the south pole!

My other images this week used both Copic markers and Prismacolor pencils. One this one I stuck to markers only. I like the look of the markers for the bear fur; I thought pencil might not be "shaggy" enough.

For my layers on this board, I cut an edge and popped up the main panel.  And while I was trying to decide upon a sentiment I noticed the backside of the patterned paper had sentiments on it, so I cut one out and popped it up! I love when things are easy.

Thanks for stopping by today.  I hope you will find time to join us in the challenge!

Products used:

  • Stamps: Stamping Bella Polar Bear and Penguin and Star
  • Dies: Queen & Co Borders
  • Copic Markers: R21, R22, R24, R29, Y18, Y19, G20, G21, G24, G28, E40, E41, E42, C0, C1, C2, C6, C9
  • Accessories: Stampin' Up! Paper - retired, Wink of Stella

Thanks for visiting today!  Follow me on Instagram, Pinterest, Facebook and Bloglovin'


post signature

12/06/2022

Tuesday Color Challenge

Happy Tuesday!  I've been taking a break all month from the CAS Colours & Sketches Challenge but today I am back for December.  Patricia has given us a twist on primary colors with Starry Sky, Real Red and Crushed Curry.

I haven't made a card in awhile and while looking through stamps I found several Stamping Bella stamps that I really wanted to color.  So this week is all about  Stamping Bella.  Yesterday I used a penguin and today an Oddball.


I love  the Oddball stamps although I have to admit that since all nutcrackers are a bit stiff and stylized this Oddball Nutcracker isn't actually that odd.  But the primary colors went perfectly with the uniform so Nutcracker it was for today's challenge!

He is mostly colored with Prismacolor Pencils; since he his arms and legs are pretty thin I decided to lay down a solid base color where he had color and then go over with the pencils for shading. It made this card go pretty fast.

In order to keep it CAS I went with a simple gold thread down the side.  I hope you'll find time to join us this week!

Products used:

  • Stamps: Stamping Bella Oddball Nutcracker
  • Markers: Stampin' Blends and Copics to color match
  • Accessories: Gold thread, Prismacolor Pencils to match

Thanks for visiting today!  Follow me on Instagram, Pinterest, Facebook and Bloglovin'

post signature

12/05/2022

Sweet Christmas Color Challenge

Good evening!  It's been awhile since I have posted.  November turned out to be a very big month for me and cardmaking had to go a bit to the side.  I can't believe I'm saying December will be calm, but I'm hoping it will be compared to last month!

I have three cards this week for three different challenges and all feature Stamping Bella stamps.  they are some of my favorites to color! My card tonight is for the color challenge at Splitcoaststampers. Karen chose Poppy Parade, Real red and Old Olive with any fourth color as Dessert.  I chose yellow because my penguin needed a yellow beak and feet!

I colored the penguin with Stampin' Blends in the challenge colors and then went over it with Prismacolor pencils.  Hard to see in the photo but his hat is Poppy Parade and his candy cane is Real Red.  

I had just received this embossing folder from Simon Says Stamp and I couldn't resist using it.  It's called Twirls but it looks like peppermint candy to me!

I've also entered this in the Can You Handle the Pressure challenge.

Products used:

  • Stamps: Stamping Bella Penguins Bearing Gifts; Stampin' Up! Sweet Gingerbread (sentiment)
  • Markers: Stampin' Blends Poppy Parade Light & Dark, Real Red Light & Dark, Old Olive Light & Dark
  • Accessories: Simon Says Stamps Twirls EF, Tim Holtz Peppermint Embellishments, Old Olive Linen Thread

Thanks for visiting today!  Follow me on Instagram, Pinterest, Facebook and Bloglovin'

post signature

11/23/2022

Yeti to Party

My card today is for the color challenge at Splitcoaststampers where I am the hostess this week.  My colors are Balmy Blue, Pacific Point and Fresh Freesia; dessert - add pink.

I colored the images with the corresponding Stampin' Blends except for the Pacific Point. I colored matched that with a Copic marker.  For my favorite pink I used Lovely Lipstick.  Not sure it's actually my favorite pink but is was my favorite with these colors!

I used the Layering Diorama dies to create a "cave" for my yeti. The blue dotted paper reminded me of snow although it wouldn't be snowing in his cave.  Oh well - it's all mythical anyway.

I hope you've enjoyed my card today.  Now it's time to run off and get to work on Thanksgiving!

Products used: All Stampin' Up!

  • Stamps/Die: Yeti to Party
  • Dies: Layering Diorama
  • Accessories: Stampin' Blends in challenge colors, Copic B16, embossing powder, banner punch

Thanks for visiting today!  Follow me on Instagram, Pinterest, Facebook and Bloglovin'

post signature

11/10/2022

Anna Griffin Thanksgiving Card

My card for this week's Tic Tac Toe Challenge features Anna Griffin products.  I chose the diagonal Embossing, Free and Wood.  I often find with this challenge my card also fits another column - Wood, Red and Animal.


As usual I was grumbling while making this card.  Anna makes it look so easy to just put the throw the elements together and suddenly you have a beautiful card.  No coloring, no stamping (usually) - just die cutting, embossing, ephemera and voila - a gorgeous card.

Holy Cow!!! There is a learning curve to making her cards.  It takes awhile to choose all the elements. Longer than I'd like to admit.  However, for a card like this it is easy to make multiples ONCE you have the design done.  While there is some cutting and embossing it is minimal.

I enjoy making cards with her products because they are a challenge for me.  Most of what I have made with her products are 3D items - easel cards, ornaments, boxes, etc.  I love making interactive and 3D crafts and hers are very detailed making them that much better.

I hope you've enjoyed my card today and will join us for this week's Team O challenge!

Products used: All Anna Griffin (except scrap of wood grain paper)

  • Fall Plaid Cardstock
  • Cartouche Cut and Embossing Folder
  • Mini Hoilday Sentiment Stickers
  • Fall Foliage Stickers
  • Birds and Butterflies Stickers

Thanks for visiting today!  Follow me on Instagram, Pinterest, Facebook and Bloglovin'

post signature

11/07/2022

Oh What Fun

My card today is for the color challenge at Splitcoaststampers.  I was pressed for time this weekend so I copied the design from the Lawn Fawn blog.  I just changed the colors to Bermuda Bay, Melon Mambo and Granny Apple Green.

For the background I made a watercolor wash using colors close to the Bermuda Bay - Peacock Feathers, Mermaid Lagoon and Broken China. The mice's scarves and hats are all colored with a base layer of Copic markers with Prismacolor pencils on top.  The mice themselves are Copics alone and I see now that I should have used pencil on them as well!

This was a fun card and very easy to create since the layout was already done for me!

Products used:

  • Stamps/Dies: Lawn Fawn Snowball Fight
  • Dies: Oh What Fun
  • Cardstock: Basic White, Dazzling Diamonds, Mixed Media
  • Copic Markers: W00, W0, W02, W03. C01, R0000, YG23, RV06
  • Prismacolor pencils: to match! (Sorry, I often don't keep track)

Thanks for visiting today!  Follow me on Instagram, Pinterest, Facebook and Bloglovin'

post signature

10/27/2022

My Little Pumpkin

My card today is for this week's Tic Tac Toe Challenge. Claire gave us a great board for fall and Thanksgiving. This card is for my youngest daughter.


I chose the bottom row across - die cuts, orange, enamel dots.

I haven't colored in awhile and really missed it.  And wouldn't you know that as I start to color again, two lights went out over my art desk! The bulbs aren't burned out so it's a call to the electrician this week. I can still get in my coloring it just needs to be early in the day when the natural light is good.

For this card I used an underlay of Copic markers and then went over it with Prismacolor pencils. I masked off the word pumpkin from the sentiment and made it larger using alphabet dies.  I didn't want to try and align everything perfectly so I went for a casual look of slightly wonky letters. And if you look closely you will see I got in one enamel dot!

Products used:

  • Stamps: Stamping Bella Set of Pumpkins
  • Dies: MFT Birdie Brown Alphabet and Numbers

Thanks for visiting today!  Follow me on Instagram, Pinterest, Facebook and Bloglovin'


post signature

10/25/2022

Sketch Challenge

My card today is for the sketch challenge at CAS Colours & Sketches. The sketch this week really had me stumped. Then I remembered some old Halloween washi tape and it was quite simple from there.


The black corner was cut from cardstock and then I layered the washi tape. I did have to cut the striped tape in half lengthwise as the stripes were getting to take up too much of the card.

A simple "boo" finished it off!  I hope you will join us this week!

Products used:

  • Simon Says Stamp "Boo" die
  • Washi tape of unknown origin

Thanks for visiting today!  Follow me on Instagram, Pinterest, Facebook and Bloglovin'

post signature

10/24/2022

Elegant Pumpkin Card

This card is for the color challenge at Splitcoaststampers this week.  Diane gave us great fall colors - Cajun Craze, Mango Melody, Mossy Meadow with Gold for dessert.

This pumpkin from the Stamps of Life is one of my favorites of their fold-it cards.  I made these cards a few years ago for Thanksgiving. Several months later my brother-in-law commented that he still had it sitting on his fireplace mantle, he thought it was that pretty.

This time I changed it up by making it an easel card. It was very easy to do. After cutting the base of the fold-it, I scored the top at about the half way point and glued the pumpkin to the top below the score line only. This allows the top of the card to bend.

The pumpkin can be solid or with the cut work. I like to do every other section cut work and back the pumpkin in metallic.

Here I sponged the edges of each section with the Cajun Craze to give them some depth. I used some oak leaves die cut from Mango Melody and sponged them with both the Cajun Craze and Mossy Meadow.

Products used:

  • The Stamps of Life Fancy Pumpkin Shaped Fold-It; Leaf Stamps and Dies

Thanks for visiting today!  Follow me on Instagram, Pinterest, Facebook and Bloglovin'

post signature

Haunted House Easel Card

I've been using my Anna Griffin dies and card supplies a lot more lately. She has some wonderful easel cards - actually some of the best shaped easel cards out there (in my opinion). I bought this last year and of course didn't make anything with it until now.

The thing that takes me FOEVER is picking the paper. After pondering colors for the window frames and shutters I decided to do the quick thing - cut them out of my choices, lay them out and then decide! This may waste a bit of cardstock (as if I don't have enough) but it really does go faster. I can always save the pieces I don't use for next time although in this instance, the parts are so small I did not. 

I have this sitting out a decoration and a few of my friends saw it. I now have a few more to make.  I guess I should have saved those small parts after all!

Products used:

  • Anna Griffin Haunted House Easel card die and Halloween stickers and sentiments
  • Stampin' Up! Magic in the Night paper, Core'dinations Gray, various solids

Thanks for visiting today!  Follow me on Instagram, Pinterest, Facebook and Bloglovin'

post signature

10/18/2022

Two Challenge Tuesday

I have two cards today for the color challenges at Splitcoaststampers and also at CAS Colours & Sketches.

My first card is in keeping with my Halloween goal this month.  It was a little bit of a stretch with Karen's colors of Old Olive, Orchid Oasis and Crushed Curry but I think Ipulled it off with Frankie.  Her dessert is to use ribbon in a creative way, so his hair is actually two strips of ribbon!


There was just no way I could figure out Halloween with the colors at CAS Colors & Sketches, although if I had more time I probably could have thought of something.  But I needed a thank you card so I pulled out an old favorite die - Floral Squares.  It makes such beautiful CAS cards!

I hope you've enjoyed my cards and will join us in one or both of the challenges!

Products used:

  • Card one: Queen & Co. Frankie and Friends and Border dies
  • Card two: SU Floral Squares dies and Go To Greetings stamps, linen thread, gems

Thanks for visiting today!  Follow me on Instagram, Pinterest, Facebook and Bloglovin'

post signature

10/17/2022

Another Road Trip - Easel Card

Tomorrow is my husband's birthday so I have a birthday, not Halloween card for you tonight!  I used the new Woodie Wagon die from Anna Griffin to make this card. This die is so perfect for those of us of a certain age who remember riding around in station wagons with wood on the side. My husband just finished converting our SUV from a normal 4 wheel drive to one with a special off-road suspension and heavy duty tires. He did all the work himself and it took a few weeks but now he'll be able to take it wherever he wants to go. He's planning on camping and visiting National Parks in his retirement.


This die was fun to use and a bit intricate.  You don't have to paper piece or make the car two tone, but it sure looks good when you do.  I used Anna Griffin stickers for the pine boughs and cones but needed to use other ephemera for the travel themed pieces.  I had some fun Washi tape that looked like a road so I added it. 


I'm not sure it shows up well in the photos but I used silver for the chrome bumpers and hubcaps along with white on the tires and headlight.  Anyone remember white wall tires?! These aren't exactly white walls but are very reminiscent of them

I hope you've enjoyed the fun trip down memory lane.  Anna has some great easel dies (among others) and makes it look so easy.  But when you start to choose what ephemera to add and how much and where...well it's harder than it looks. There is definitely a learning curve, even with the colors to choose.  It makes a big difference but with patience the results are well worth it!  You get some very impressive cards.

I'll be posting more using Anna Griffin products in the months ahead.  I really enjoy using them as a different kind of crafting and cardmaking method.

I am entering this in the Sisterhood of Crafters Masculine Card Challenge.  (One we all should participate in because I know it's the one type of card most of us need and yet make the least!)

Products used:

  • Dies: Anna Griffin Woodie Wagon
  • Ephemera: Anna Griffin Woodland Holiday Stickers and Birthday Sticker from Create 7, Carta Bella Road Trip
  • Paper: AG Handsome, SU Night of Navy, Very Vanilla, Silver Foil, Red, White, Wood (retired)
  • Accessories: Road Washi tape

Thanks for visiting today!  Follow me on Instagram, Pinterest, Facebook and Bloglovin'

post signature

10/13/2022

Frightfully Good Halloween Shaker

Happy Thursday! My card today is for the Tci Tac Toe Challenge.  Silke gave us a great board and I chose the top row across - shaker, slim card, fold card.


This is not my usual Halloween card.  I usually go for the cute or pretty Halloween, not the scary or creepy.  This skull is part of a shaker card kit from Queen & Co, and quite honestly I never expected to use it.  Just not my style.  But then I saw this Halloween paper in my stash and thought "why not"?  The skulls on the paper aren't creepy and I thought it would make this skull less so.


I made it a mini slimline and a fun fold to fir the challenge.  After constructing it, I'm not sure why I didn't put the flap on the left but it works either way. Oh well, next time.

I've seen this same shaker as a sugar skull for Dia de los Muertos (Day of the Dead) and I would love to try making one like that as well!

Products used:

  • Shaker Kit: Queen & Co. Spooktacular
  • Dies: Quuen & Co. Basic and Halloween Sentiment Stacker
  • Paper: Stampin' Up! Cute Halloween
  • Markers: Copic R20

Thanks for visiting today!  Follow me on Instagram, Pinterest, Facebook and Bloglovin'

 
post signature


10/11/2022

Candy Corn is A Vegetable

I love this sentiment even though I really don't like candy corn!  (In fact I like corn better than candy corn.)  I thought the sentiment went quite well with this fun stencil from Simon Says Stamp.


It's a four step layering stencil; since one of the layers - the top of the candy corn - should technically be white I wasn't quite sure how to handle that at first.  After trying to give it shading by using a light grey, I decided making it a much lighter shade of the yellow worked best.

This is a super easy card to make as the sentiment is from a pack of pre-printed sentiments also from Simon Says Stamp.  To finish it I added a few enamel dots in matching colors.

I am also entering this in the Stencil Fun challenge.

Products used:

  • Stencil: Simon Says Stamp Halloween Candy
  • Inks: Distress Ink - Lucky Clover, Mustard Seed, Carved Pumpkin
  • Sentiment Strips: Simon Says Stamp

Thanks for visiting today!  Follow me on Instagram, Pinterest, Facebook and Bloglovin'

post signature

10/10/2022

Lawn Fawn Bats and More Bats

I'm the hostess at Splitcoaststampers Color Challenge this week.  I chose Highland Heather, Bermuda Bay and Parakeet Party with embellishments as dessert.  

I'm keeping with my Halloween theme and although these colors don't necessarily scream Halloween, I think they do quite nicely.  I played around with making the sky cloudy but ultimately chose to go with a straight blended sky in Bermuda Bay.  The moon is a very cool stencil from Spellbinders that can give a pretty realistic looking moon depending on the colors used.  Here I used Parakeet Party.

The bats  are colored in Copic markers to color match the Highland Heather and the sentiment is from a pre-printed sentiment package from Simon Says Stamp.

I'm trying to use my stash and I have a TON of enamel shapes so you can expect to see them on most cards in the near future!

I hope you've enjoyed my card and will join us in the challenge this week!  I am also entering this is the "Make the Cards" challenge - theme Halloween and the October Stencil Fun challenge.

Products used:

  • Stamps / Dies: Lawn Fawn Fangtastic Friends
  • Stencil: Spellbinders Layered Moon
  • Ink: Distress Oxide Peacock Feathers, Twisted Citron
  • Markers: Copics - V01, V12, V15, V17, E23, E25, E27, G99, G94
  • Accessories: White gel pen, Gesso

Thanks for visiting today!  Follow me on Instagram, Pinterest, Facebook and Bloglovin'

post signature

10/07/2022

Frightful Friday 2022

It's October and I'm back with a Frightful Friday for Halloween!  You may think this card is a bit out of my usual style - and it is.

It uses products from Anna Griffin - a crafting company with very ornate, Victorian inspired images.  Anna has some fantastic easel card dies; most are large making 5 x 7 cards.  They make for very impressive cards - definitely good for milestone birthdays and events.

This is the pumpkin easel card.  I used some old Core'dinations card stock since I wanted a distressed look.  I'm not sure if Core'dinations is even made anymore but I have a bunch of it so I'm not worried about needing more!  

The hardest part of making Anna Griffin cards for me is choosing the embellishments.  There are so many beautiful ones and while Anna makes it look simple, it's not!

I hope you've enjoyed today's card.  Keep visiting this month for more Halloween inspiration!

Products used:

  • Dies:  Anna Griffin Pumpkin Easel
  • Embellishments: Anna Griffin Mini Halloween Sticker and Embellishments
  • Paper / Cardstock: Core'dinations, retired Stampin' Up! Halloween paper

Thanks for visiting today!  Follow me on Instagram, Pinterest, Facebook and Bloglovin'

post signature