7/31/2018

A Banner Birthday

Happy Tuesday!  Today is the last challenge for July at CAS Colours & Sketches and since it's the fifth Tuesday of the month it's a double challenge - both colors and sketches.  As challenge hostess, I got to pick both from retired sketches and retired colors.  I decided upon a sketch that had a banner across it.  I think that subconsciously I knew I wanted to use a specific die that I had in my stash and never used and this sketch was perfect for it.  And the colors I chose are among my favorite retired In-Colors.
Although this stamp set is called Birthday Chicks made them into robins.  At least I think they're robins - not quite a red chest but close enough.  I used Copic markers and color matched the colors.

For the banner, I cut it using two different colors.  Then I cut the banner from the top of the bottom panel.
And slipped the banner right in.
At first I was going to lay the banner on top and cut the curve by hand - this way was MUCH easier!  I just had to snip off the excess on the sides.
When it came time to assemble I used a stack of five Baked Brown Sugar ovals underneath the white oval instead of foam dots.  I really like the look of this as it adds a little color and there are no gaps.  (Of course the downside is that if you are mailing the card it adds weight.)  Since this made the oval stand up quite a bit I was hesitant about how to adhere the die cut birds.  Foam dots would make them a bit too high and I didn't want them flat.  I ended up die cutting two more of each shape from white card stock.  This gave just enough height.

Stamps and Dies:  MFT BB Birthday Chicks
Dies: MFT Party Banner and Inside Out Stitched Ovals
Copic Markers: Pistachio Pudding - G0000, YG11, YG41, Strawberry Slush - RV14, RV13, RV10; Baked Brown Sugar - E57, E55, E53, E50

Thanks for visiting today!  Click here to sign up for email notifications of future posts  (you will be sent an email to verify your address - don't forget this step).  Follow me on Facebook, Instagram and Pinterest.


post signature

7/30/2018

Wish Upon A Reindeer

Today I am the hostess for the week's color challenge at Splitcoast Stampers!  Last week we had a Christmas in July theme as a bonus and I kept that going this week.  Since I picked more traditional holiday colors (Poppy Parade, Lemon Lime Twist, Garden Green)  it should probably be a bonus to make a non-Christmas card with them!
This image was fun but challenging to color.  One of the more difficult images I've done in awhile.  Not only are there a lot tiny spaces to fill in but a good portion of the image is red.

Reds are always hard with Copics.  They tend to get saturated fast and bleed.  I had quite a bit of bleeding near her hat.  Fortunately, I was able to cover it up using a combination of the blender pen and the next color to go down - the dark browns of her hair.  I usually color my reds first  because of their difficulty.  Then if things go south I can start over without losing too much.
I'm pleased with how this came out.  I used a few Prismacolors over some of the image to add detail.  I like to do this with Stamping Bella images.

I had a fun star stencil that I used to the background. The star she is holding is colored with neutral grays and Wink of Stella.  Originally I was going to use a silver or white glitter paper for the word Wish but thought better of that.  The vellum is much subtler and allows the focus to be more on the image.  I find that Ranger Multi Medium Matte glues down vellum with little to no show through.

I've had several posts on color matching - for the basics click here and here.  You can also search the blog using "Copic coloring matching."

Stamps and Dies: Stamping Bella Tiny Townie Rita and the Reindeer
Die: Cottage Cutz Wish Phrase
Copic Markers:  Lemon Lime Twist - YG00, YG01, YG23; Garden Green - G20, G21, G24, G28; Poppy Parade - R20, R21, R22, R24; Reindeer - E50, E53, E55, E57, N1, N5, N7, E41, E42;  Rita - E0000, E000, E11, R20, E53, E35, E37, E29; Star - N1, N3
Accessories:  Stampin' Up! Ribbon and iridescent sequins; Heidi Swapp stencil

Thanks for visiting today!  Click here to sign up for email notifications of future posts  (you will be sent an email to verify your address - don't forget this step).  Follow me on Facebook, Instagram and Pinterest.


post signature

7/27/2018

Fairy Shaker Card

Follow my blog with Bloglovin
Happy Friday!  I have been making shaker cards like crazy - three in the past 10 days.  Last Friday I had one for you and I have another today. (I'll post my third one soon.)

This card is simple to make but really makes an impact.  Part of the design was inspired by a box my mother-in-law made for my daughter.  She is also a papercrafter and made a monochromatic box highlighted in places with Wink of Stella. I decided to do that here.  The Wink of Stella on just the vines and word really make them stand out.

I wanted to keep the card very simple and elegant as I felt that was in keeping with the fairy theme and this style of dies. And I love the new Stampin' Up! color Soft Seafoam! I toyed with making the back of the shaker a deep green or blue (and even a light blue like a sky) but decided to stick with just a slightly darker green background.


This paper is one of my favorites.  I call it "cheater" paper.  Its is a pre-printed watercolor background.  I love making watercolor backgrounds but sometimes I just don't have time.  Or as in this case, it will be mostly covered up by the other card elements and the shaker sequins anyway so why take the time.

I can see making this card again in other colors.  It goes together so quickly.  What takes the longest is making sure that your glue dries on the back panel vines before putting the shaker together.

I used Cottage Cutz dies and this card is featured on their blog today.  Click here for complete instructions on how to make it!

Dies used: Cottage Cutz Spring Fairy Scene, Leafy Vines and Imagine Phrase
Card Stock: Stampin' Up! Soft Seafoam, MFT Watercolor Paper
Accessories: Wink of Stella, 28 Lilac Lane Fairy Sparkle Sequins

Thanks for visiting today!  Click here to sign up for email notifications of future posts  (you will be sent an email to verify your address - don't forget this step).  Follow me on Facebook, Instagram and Pinterest.

post signature

7/24/2018

Life's a Beach

Happy Tuesday!  Today we have a sketch challenge at CAS Colours & Sketches.  I came up with this sketch and it did turn out to be a little challenging.  I wanted to do a summer image and I had never inked up this stamp so thought I'd give her a go.
Here is the sketch:

To get the colors I picked the paper first.  Sometimes I know what colors I want to use on an image but when I don't I'll find patterned paper that I like and fits the theme, then go from there.  Blue and yellow are classic summery colors to me while the dots and stripes work perfectly with the inner tube, so this was an easy choice. 
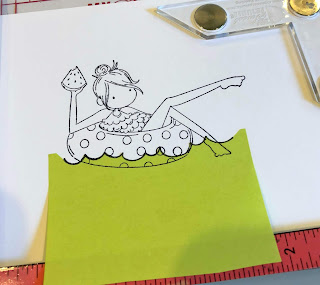
I stamped the waves first then used a sticky note to mask them off and stamped the girl.  I colored her with Copic markers.

The difficult part of this card was actually cutting that angled section.  I used a stitched rectangle die to cut out the image pane and then placed it where I wanted it on the card overhanging the edges.  I made light marks with pencil and used my paper trimmer to cut off the top and side. The girl had to be placed far enough to the side and low enough down so I would not cut off her foot and had room for a sentiment.  That took a bit of planning and was the tricky part in the layout.

I hope you'll join us at the challenge this week!

Stamps: Stamping Bella Tiny Townie Frances Loves to Float
Dies: Cottage Cutz Stitched Rectangles
Paper: Stampin' Up! DSP Brights
Copic Markers: B21, B23, B24, B28, Y13, Y15, Y18, Y19, E00, E11, R21, R24, G00, G19, B000, B00, BG0000

Thanks for visiting today!  Click here to sign up for email notifications of future posts  (you will be sent an email to verify your address - don't forget this step).  Follow me on Facebook, Instagram and Pinterest.

post signature

7/23/2018

Christmas Puppy

This is my card for the color challenge this week at Splitcoast Stampers.  Mary picked some fun colors - Berry Burst, Smoky Slate and Granny Apple Green - and further challenged  us to make a Christmas card!
I decided to color this little pup kind of like a Shih Tzu.  Ten years ago I received a Shih Tzu mix puppy for Christmas and I've hinted that she needs a friend.  Maybe this year....

I used my Stampin' Blends in Granny Apple Green and a light YG for the green, then color matched the other colors using Copic markers.  For tips on coloring matching Copics please see my earlier posts here and here.

I wanted the sentiment to really stand out so after stamping it, I stamped it again in Versamark ink and heat embossed it using clear embossing powder.
The panels and ornament are glued directly to the card.  To give dimension, I used foam dots to lift up the pup and a double layer of foam dots for the present.

I've also entered this in two Simon Says Stamp challenges this week. Monday Challenge - Christmas in July and Simon Says Stamp Wednesday Challenge - Use a Die or Punch

Stamps and Dies:  MFT Happy Pawlidays, Stitched Rectangles
Markers: Stampin' Blends Granny Apple Green Light and Dark, Copic markers YG21, RV66, RV69, RV63, RV0000, N0, N1, N2, N3,
N4, N5, N8
Paper: Stampin' Up! Winter Frost (retired)
Ink: Stampin' Up! Granny Apple Green, Berry Burst 

Thanks for visiting today!  Click here to sign up for email notifications of future posts  (you will be sent an email to verify your address - don't forget this step).  Follow me on Facebook, Instagram and Pinterest.


post signature

7/20/2018

3 D Thursday - a day late!

Happy Friday!  I haven't posted a 3-D Thursday card in quite some time and I'm a day late with this one.  Oh well, the best laid plans.....

So today I have a fun shaker card for you!  I love interactive cards and this one uses some really cute dies.  This mouse and snail are just adorable.
I started with an A2 sized top fold card base.  I cut a panel from patterned paper the same size as the front (5 1/2 x 4 1/4 inches) and a slightly smaller panel from a coordinating paper for the back of the shaker.  Next I die cut all my pieces for the foliage and critters from a variety of green and neutral card stocks.

Because the word "Discover" is pretty fine I placed double sided adhesive paper on the back of the card stock before die cutting.  It makes it easier to adhere to the card.  After cutting the oval and putting on an acetate window on the front panel, I arranged all of the elements for the scene.
When I finished I put a double layer of foam tape on the back.  Keep the tape very close to the shaker.  It does not have to touch on all sides of the opening as long as the sequins (or beads or whatever) can't escape through any holes.  I used anti-static powder to the inside of the tape so my sequins would not stick to it.
I added about one tablespoon of sequins in the center of the card.  (And a rather tragic thing happened to make this color mix.  I have a packet of eight different purple sequins all separated in a divided package. While I was carefully choosing a little of this shade and a bit of that shade, I hit the package and it SPILLED all over my desk!  I now have a container of mixed purple sequins! Oh well, as I said above the best laid plans....)
Then I placed the card front on top.
I hope you enjoyed this card today.  It was a lot of fun to make and will be even more fun to give.

Dies used:  Cottage Cutz Forest Critters, Mushrooms and Greenery, Discover Phrase and Nested Stitched Ovals

Thanks for visiting today!  Click here to sign up for email notifications of future posts  (you will be sent an email to verify your address - don't forget this step).  Follow me on Facebook, Instagram and Pinterest.

post signature

7/17/2018

Just Keep Swimming

Happy Tuesday!  This is my third week as the challenge hostess on CAS Colours and Sketches.  This week I have a color challenge.  We'd love to have you join the challenge!
I originally planned to do a floral card, but this set called to me.  The colors this week are:
I decided to do a wash of the Coastal Cabana with just a bit of the Lemon Lime Twist at the bottom.  When it was dry I added the bubbles using the Coastal Cabana ink. The first generation stamp was too dark so I stamped off before stamping my background.
I watercolored the seahorses using reinkers in the challenge colors and stamped the sentiment.
The seahorses are covered in Wink of Stella - I used a new pen and it's amazing how much more bling you get with a new one!  Who knew they don't last forever?  ;)  I put foam dots under the seahorses and added a few iridescent sequins here and there.

Stamps and dies: The Stamps of Life Under the Sea class set
Ink: Stampin' Up! Coastal Cabana, Lemon Lime Twist, Powder Pink
Accessories: Wink of Stella

Thanks for visiting today!  Click here to sign up for email notifications of future posts  (you will be sent an email to verify your address - don't forget this step).  Follow me on Facebook, Instagram and Pinterest.


post signature

Happy Hour!

Hi everyone!  This card is for the color challenge at Splitcoast Stampers this week.  The challenge was to use Pear Pizzazz, Calypso Coral, Pineapple Punch and make it tropical if possible.
Well, I'm all about Hawaii and Mai Tai's so this challenge was right up my alley.  To color the drinks I used my Stampin' Blends in Pineapple Punch and Calypso Coral, but I substituted Granny Apple Green and Soft Seafoam for the Pear Pizzazz.  When participating in a color challenge and using markers, pencils, etc. you sometimes just have to adjust and get close.  (I did use my C0 Copic marker for the shadows on and under the glasses.)  Diamond Stickles are the salt on the Margarita.
I had the woven paper in my stash and liked the look it gave, but thought the card needed something extra.  The floral patterned paper made me think of one of my husband's Aloha shirts.  I added the leaves that I die cut from Pear Pizzazz card stock and sponged with Pear Pizzazz and Pineapple Punch inks.

Stamps: Stampin' Up! Mixed Drinks
Dies:  MFT  Stitched Tags, MFT Blueprints 4, Stampin' Up! Tropical Thinlits
Markers:  Stampin' Blends, Calypso Coral - light and dark, Pinapple Punch - light and dark, Granny Apple Green - light and dark, Soft Seafoam - light, Copic C0
Paper: Stampin' Up! Pear Pizzazz, Whisper White, Whole Lotta Lovely DSP; Kaiser Kraft woven look

Thanks for visiting today!  Click here to sign up for email notifications of future posts  (you will be sent an email to verify your address - don't forget this step).  Follow me on Facebook, Instagram and Pinterest.
 

post signature

7/12/2018

Aloha with Rosie and Bernie

Happy Friday!  Are you ready for the weekend?  I am!  I've been coloring a lot of Stamping Bella images lately.  I just adore them.  I fell in love with the Rosie and Bernie series when it was released but haven't had the time to color any of those images.  So last night I thought I'd give it a try.
Here are Rosie and Bernie in Hawaii.  My husband and I have a company in Hawaii and travel there a lot.  It's sort of my home away from home.  This definitely needed to be my first R&B image to color.
I started coloring it as en experiment.  The style of the stamps is very loose so I wasn't certain that my tight style of coloring would fit well with any of theses image.  But it's always good to try new things.  So I pulled out my ZIG Kuratake Real Brush Pens.  I find these are better for a looser look than Copic markers.  (But of course that's just me and my style.)  I stamped and colored the palm tree then used a light blue and a few shades of beige to add a bit more substance to the  background.  I tried to keep it loose.
I colored in Rosie and Bernie, die cut them and added Wink of Stella to Bernie's horn.  They are popped off the card using foam dots.

I'm not sure this is my favorite card, but since I was just practicing with the ZIG pens and I actually got an image I could use for a card, I'm happy!  I already have a few additional ideas using this same stamp.  I love it!

Stamps and Dies: Stamping Bella Rosie and Bernie in Hawaii; Rosie and Bernie's Palm Tree

Thanks for visiting today!  Click here to sign up for email notifications of future posts  (you will be sent an email to verify your address - don't forget this step).  Follow me on Facebook, Instagram and Pinterest.


post signature

7/10/2018

Smell the Roses

Happy Tuesday everyone!  This week I'm the hostess for the sketch challenge at CAS Colours & Sketches.
I love sketch challenges because I feel like most of the work has been done for me (of course this time I had to come up with the sketch so no break here!)
I colored the image using Copic Markers.  Then I die cut the image with a Stitched Arch frame die from My Favorite Things.
When using a frame I find it easier to glue the frame down first and then lay the center piece inside the frame.  In this case I used the colored image as part of the frame.  There are three coral arch frames underneath to add dimension and color.
 I used Wink of Stella on the fairy's wings to add glimmer and sat her on the frame.
Since I didn't want to cover up my coloring (I can get quite attached to my coloring - LOL) I used vellum for the  banner and heat embossed the sentiment in gold.  The word "the"is a bit hard to read but since this is a common saying I didn't think it was too much of a problem.

Stamps: Stamping Bella Floral Forest Backdrop and Little Bits Fairy Set
Dies: Stamping Bella Fairy Set Dies, MFT Stitched Arch Dies
Copic Markers:
Floral - R12, R17, R19,RV23, RV25, RV29, RV63, RV66, RV69, RV52, RV000, BG40, BG43, BG46, G40, G43, G46, G21, G24, G29, YG11, YG 13, YG17, E30, E35, E37, B000, B0000 
Fairy- E000, E00, E11, E21, E23, E27, E29, Y13, Y15, Y19, V01, V000


Thanks for visiting today!  Click here to sign up for email notifications of future posts  (you will be sent an email to verify your address - don't forget this step).  Follow me on Facebook, Instagram and Pinterest.

post signature

7/09/2018

Most of All - Have Fun!

Hi everyone!  I've been somewhat out of commission the past month or so - LOT'S of stress, drama and changes in my life...

I know it's all part of life's ups and downs and I'm optimistic that things are now on the upswing.  That said, I finally made a card just for me!  No card challenge, no occasion, a just because I wanted to make it card.
Stamping Bella stamps are some of my favorites.  I think I could color these all day long!  Their images are cute and quirky, and the different series appeal to me in different ways.  The gnomes are fun to color because they are chubby and round and they are fantasy.  Great thing about fantasy characters - no rules!  However, I did go for a traditional look for this guy.  (Bonus cute with this image - the little worm in the upper left!)

I wanted a sponged background so I first had to mask off all the elements.  I did a trial with masking fluid but it didn't dry fast enough for me and when I erased it, some of the paper peeled in the larger leaves.  So I fussy cut masks and put them down using Tombow temporary tape runner.
I didn't take a picture of them in place, but I did  save them all for future use.  When my husband saw me cutting each leaf he thought I had gone nuts.  But I think it was worth it.
For the sky I used Soft Sky ink and a MFT Cloud stencil; for the ground I sponged on Soft Suede ink and then drew in some grass with a Copic Multi liner pen and went over that with a Copic marker in G94.

The hard part was cutting up the image after I was done.  I had picked the patterned papers before I started to get the colors I wanted to use, but after it was finished I had to make some choices as to exactly how I wanted to use them.

And after the past six weeks or so the sentiment says it all - FUN!!!!

Stamp: Stamping BellaGnome on a Swing
Copic Markers: Y26, Y19, Y15, Y11, BG49, BG45, BG23, G94, G99, YG91, YG93, (Worm YG21, YG23, YG25, BV0000, BV00, BV02), E43, E44, E47, E000, E01, E11, R20, BV23
Other: MFT Cloud stencil, MFT Stitched Oval Frames, Lawn Fawn Tiny Tag dies, Michael's small word dies, Stampin' Up! DSP and cardstock in Crushed Curry, Bermuda Bay and Coastal Cabana

Thanks for visiting today!  Click here to sign up for email notifications of future posts  (you will be sent an email to verify your address - don't forget this step).  Follow me on Facebook, Instagram and Pinterest.


post signature

7/03/2018

A Happy Hello

Happy Tuesday!  I have some exciting news - for me anyway.  Today mark's my first day hosting the challenges at CAS Colours & Sketches blog.  I will be the hostess for the month of July!
For this week's colors I chose:
The card is created mainly with die cuts.  The only stamping is the wood grain on the birdhouse.  I used sponge daubers and ink to add a bit of dimension to the various die cut pieces.

Please join us this week for the challenge.  We would love to see your creations!

Dies:  MFT Birds of a Feather, Stitched Frames
Cardstock: Stampin' Up! Grapefruit Grove, Daffodil Delight, Highland Heather, Soft Suede
Ink: Grapefruit Grove, Daffodil Delight, Highland Heather


Thanks for visiting today!  Click here to sign up for email notifications of future posts  (you will be sent an email to verify your address - don't forget this step).  Follow me on Facebook, Instagram and Pinterest.

post signature