11/29/2017

Feliz Navidad - Adding Detail in Multi-Step Stamping

Today's card features two gorgeous stamp sets from Altenew stamps - Build-A-Flower Poinsettia and Peace on Earth.  
I fell in love with the Poinsettia set as soon as I saw it.  It is a three step stamp with an outline that makes a beautifully detailed poinsettia.  The sentiment is from Peace on Earth, a set that has Merry Christmas in numerous languages including Afrikaans, Hawaiian and Spanish - all languages I need for cards!

The flower and the leaves are actually the same stamp just stamped in different colors, die cut and offset.  The the greens that I used for the leaves gave lots of good contrast but the three shades of red did not have the contrast I would have liked to show the detail of the petals.  In order to turn up the contrast I used a colored pencil that was a little bit darker than the darkest red used in the flower.
It was very simple.  I outlined the inside petals with the pencil then added a bit of pencil to the areas that I thought would have the deepest shadows.  Since the pencil was the same red only darker I did not need to be to concerned with blending it in well.  If  I had used a contrasting shade (perhaps a blue) I would have needed to be more aware of blending it into the red.
This shows the difference between one with the pencil (left) and one without (right).  The difference isn't dramatic but the pencil does enhance the detail of the flower.  And it literally only took a minute (if that) to do.

When I was finished with the pencil, I added Wink of Stella to the inner petals and Stickles to the center of the flower.

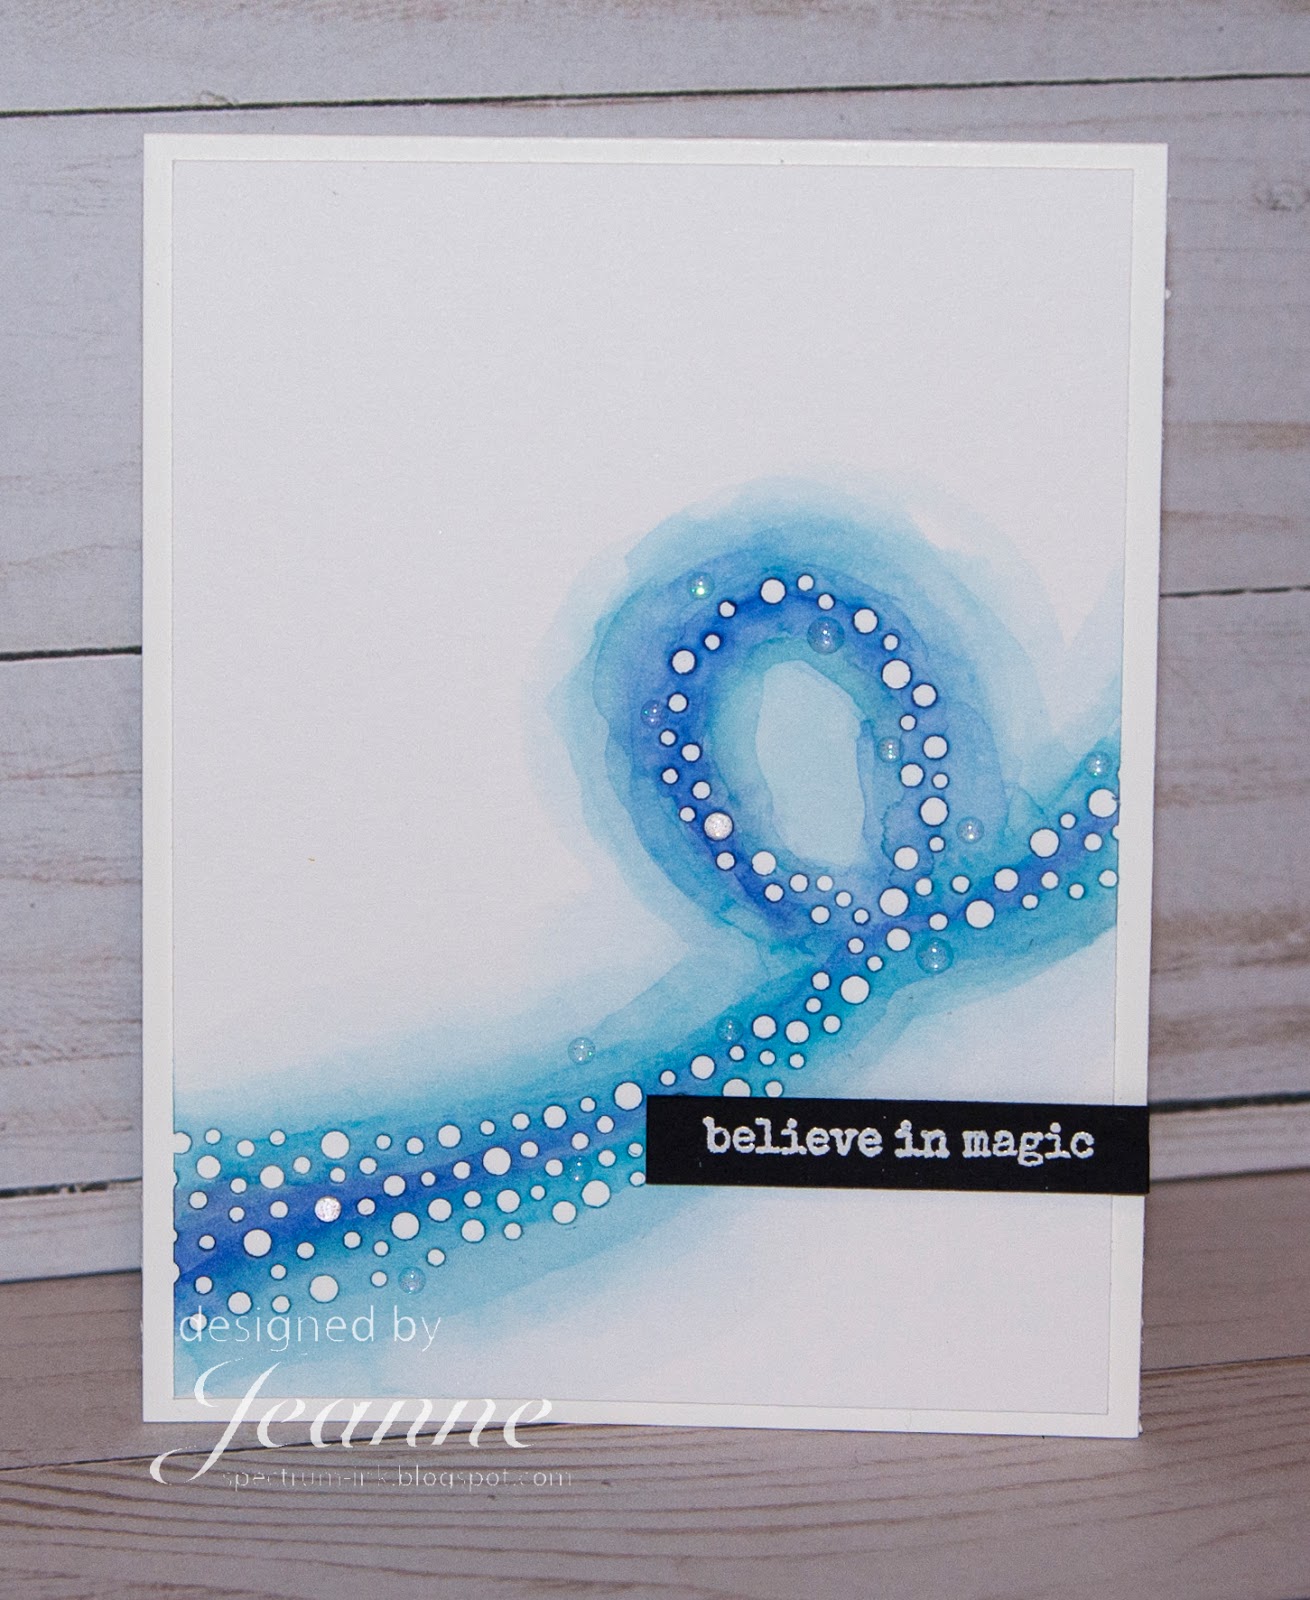
The background was created using two different shimmer mists and a stencil. I used various metallic washi tapes on the side to add a bit of a sheen.
I'd like to thank Altenew for sending the Peace on Earth set so quickly.  I realized quite late that I did not have a Feliz Navidad stamp for a card that I needed to send two days ago.  When I ordered the set I asked for priority shipping but also knew that with the Thanksgiving holiday there was a fair chance the set would not arrive in time.  I messaged Altenew and they shipped the set the same day!  Great service!  And I received it in time to make my deadline - thank you Altenew! 

Stamp/Die Sets: Altenew Build-A-Flower Poinsettia, Peace on Earth
Ink: Altenew Velvet, Crimson, Rouge, Evergreen, Forest Glades, Frayed Leaf
Shimmer Mist: Altenew Frayed Leaf
Stencil: Tim Holtz

Thanks for visiting today.  Don't forget to follow me on Facebook, Instagram and Pinterest.  To be notified of new blog posts, please sign up for email notifications.


post signature

11/27/2017

Happy Birthday Pandas

Update to this post! The panda stamp is now available FREE with a qualifying order!  Click here for more information.

 I hope you had a great Thanksgiving weekend!  It was very busy for me but I did get some time in to work on cards.  Today's card is for the CAS Colours and Sketches color challenge for November 21.  The challenge this week was their 250th AND celebrates their fifth birthday!
Stampin Up Party Pandas
The colors are:
I decided to make a birthday card using the panda from Party Pandas and some balloons from Balloon Celebration.  I stamped one the large balloon several times, masking them to create depth.

I wanted stripes on the side and I have a nice background stamp that I thought would work.  Unfortunately when I tried masking off the stripes it just didn't stamp well.
So I stamped the stripes on the side of an A2 card and cut my panel with the panda down to 5 1/2 x 4 inches so I would have a 1/4 inch strip down the side.  When I tried laying this panel on the striped panel I could see the stripes through the white card stock.  I ended up gluing a black panel to the back of the panda panel to prevent "show-through" - kind of like a camisole.

The balloons are colored with Copics and Stampin' Blends markers.  Since the colors specified are Stampin' Up colors I decided to use as many of the Blends as possible.  The Blends do not have really light value makers so I used a few Copics as my lightest values.  Also, the Blends are not available in every color so I had to color match my blue.

I always color more than one card - in this case between my first and last panda panel, I decided I needed one more balloon, so you see four balloons in the final card.  I used a multi-liner pen to hand draw most of the strings.

This card went fairly fast and was easy to color.  It would also look great with the balloons colored flat without shading.

Update to this post! The panda stamp is from a Sale-A-Bration is now available!

Stamps: Stampin' Up Party Pandas, Balloon Celebration, Brushstrokes
Markers: Stampin' Blends Cherry Cobbler and Copic R32; Daffodil Delight and Y11; B12, B14, B16; shadows N0, N1

Place a $30 order and receive a FREE PDF using the "Sure Do Love You" and "Heart Happiness" stamp sets.  Use hostess code CYB2H9TW when placing your order.  (Do not use if your order is $150 or more before tax and shipping. In that event, YOU will receive the hostess benefits!)

Thanks for visiting today.  Don't forget to follow me on Facebook, Instagram and Pinterest.  To be notified of new blog posts, please sign up for email notifications .


post signature

11/24/2017

Go Pokes - Some Team Spirit in Cardmaking

This has been quite a week for me, so today I'm featuring a card I made awhile back instead of a new card. This was created for two challenges on Splitcoast Stampers. One was to use school colors and the other, a football theme.
As an Oklahoma State University mom (and former OSU employee), the Cowboys have a special place in my heart.  I made this card for my daughter when she was attending school there. The image is colored with Copic markers and the logo is heat embossed in clear.

Personalizing stamped images is a great way to let someone know that you're thinking about them and also that you care enough to think of the little details in the card. 

Stamps: TCP Football Rabbit, Color Box Collegiate stamps
Dies: Lawn Fawn stitched curves

Thanks for visiting today.  Don't forget to follow me on Facebook, Instagram and Pinterest.  To be notified of new blog posts, please sign up for email notifications .

Have a creative weekend!  (And GO POKES!)


post signature

11/22/2017

How to Help in the Kitchen - Add Wine!

While the image on a card usually grabs my attention first, the sentiment is often what strikes me most.  And when I saw the sentiment stamp used on today's card I thought it was hilarious.  I'm having 21 people for dinner tomorrow and by the time we're sitting down to eat, I'll definitely feel this way!
The panel is 3 1/2 x 5 inches - an odd size for a card but I wanted it to fit in an acrylic frame that I have.  I cut the white card stock to that size and stamped the sentiment.  Then I used a Post-It note to mask it and stamped the main image (normally she has legs and feet).  After coloring, I die cut the image out and glued it to the plaid base.  It probably took me longer to decide on the colors for the small tags and exactly which plaid I was going to use than to color the image.  Does that happen to anyone else?

As usual, I colored two - "just in case"...and they both came out this time.  So I thought I would show you the color variation. (Sorry the photo is a bit blurry.)

I hope you have a great Thanksgiving tomorrow - filled with friends, family and laughter!

Stamps: Stamping Bella Opal the Optimist, Funny Bones by Riley and Company
Copic Markers: Skin E50, E53, E11; Hair  E53, E35, E37; Dress BG70, BG72, BG75 or B91, B93, B95; Bow and Flowers E95, E97, E99; Leaves G43; Dots R85; Wine R83, R85, R89; Label YR 30, Y21, Y26
Dies: Lawn Fawn Inside Out Stitched Scalloped Rectangles, Technique Tuesday Charming Hearts
Paper: Lawn Fawn Perfectly Plaid Fall and Perfectly Plaid Chill

Thanks for visiting!  Follow me on Facebook, Instagram and Pinterest.  To be notified of future blog posts please sign up for email notifications.


post signature

11/20/2017

Believe in Magic - Adding Dimension to a Clean and Simple Card

It's another magical Monday with today's card.  I made this card for this week's CAS Colours & Sketches sketch challenge.  I used two techniques to give this clean and simple card a little bit of dimension and interest.  When adding to a CAS card you need to be careful not to add too much, or your card is suddenly no longer CAS!
I started with a panel of mixed media paper cut to 5 1/4 x 4 inches.  I used a die to cut the swirl then I watercolored around it using Distress Inks.  I love doing cards like this - they are very organic and no two ever come out the same.  I started with the lightest ink and added some darker blues to the center.  Then I added more light around the edges.  In between I used a heat gun to dry my layers.  I kept doing this until I was satisfied with the look.  When I was finished I adhered the panel to a top folding A2 card base.

I struggled with the right sentiment when I came across this one in my stash.  It seemed to fit perfectly.  I heat embossed it on a black panel and cut it to size.  I didn't want it flush with the card base, that seemed too flat and it needed some depth.  I tried using foam tape on the back but then it was way too high for the size of the strip.  It looked a bit ridiculous.  I ended up lifting it off the card slightly by using a stack of four pieces of black card stock the same size.  This has become one of my go to ways to add dimension.

I wanted the swirl to have some sparkle but not in an obvious way, so I added some clear glitter enamel dots.
Some I added to the blue areas and some fit perfectly in the holes created by the dots.  Because they are clear and glittery, they add just a hint of sparkle.  Hard to see in the photo but pretty striking in person.  Just enough to emphasize the "magic" of the image.

Adding dimension with a few layers of card stock and adding some interest with clear embellishments are two ways to add something extra to your cards while still keeping things simple.

Stamp: Impression Obsession Words for Art
Die: Simon Says Stamp Bubble Breeze
Distress Inks: Broken China, Mermaid Lagoon, Blueprint Sketch, Faded Jeans

Thanks for visiting today!  Follow me on Facebook, Instagram and Pinterest.  To be notified of future blog posts please sign up for email notifications.

post signature

11/17/2017

Peaceful Wreath

Happy Friday everyone!  I have one more peaceful Christmas card for you today.  This one is a bit more elegant than Wednesday's post.  I originally made it as part of the Bloom Art Stamps design team.
The main image is heat embossed in white on white card stock.  I then sponged the background using several shades of blue.  I adhered it to a 5.25 x 5.25 inc card base in Baja Breeze.  I chose the blue base color after I had sponged the background.  I found it easier to match the card stock to the background rather than trying  to get the sponging just right.

The bird is stamped in red on red card stock and fussy cut out.  I die cut "peace" in white and 3 pieces of red.  I stacked these together to give it depth and a slight red edge when seen at an angle.  I really like that effect.

For some added sparkle and interest I added a bit of silver twine and red sequins.

Stamps: Bloom Art Stamps Seasons: Wreath Birds Butterflies - Artist Series by Yuqi Lu

Thanks for visiting today!  Follow me on Facebook, Instagram and Pinterest.  To be notified of future blog posts please sign up for email notifications.


post signature

11/15/2017

Peaceful Bunnies Christmas Card

Hi everyone!  I took a bit of a break after attending the Stampin' Up! event - lot's to catch up on at home. Spoiler alert!  Today's card is one that you may see in your mailbox if you're on my Christmas card list.
This was originally created for a color challenge on Splitcoast Stampers.  I will probably switch up the background colors to be a bit more blue when I make this again.  But in a color challenge - rules are the rules, you need to use the colors stated or something very close! 

I die cut the front panel of the card using a My Favorite Things Stitched Rectangle that was slight smaller than an A2 card size.  Using an Outside Stitched Circle that was slightly larger than the die used for the stars, I cut a hole in the panel.  On a square piece of white card stock a little bit larger than the hole, I blended Pool Party (light blue) and Tranquil Tide (teal) together using a blending tool.  Then I used the Starry Circle die to cut out the stars and adhered a piece of silver glitter paper to the back.  The star panel is glued to the card and the top panel is popped up using foam tape.

The bunnies are colored using neutral gray Copic markers.  Normally I would use warm grays for animals but since I was using silver I thought the neutral gray went better. The small bunny and "Peace" are glued directly to the front and the large bunny is put on with foam dots.

This card is very simple to make - the blending is the only thing that takes some time.  As I said, I intend to try it with bluer ink colors and may try it using a wet "splat" technique that will go faster.  I'll post it when I try it.

Stamps and dies: Lawn Fawn Upon a Star
Dies: MFT starry circle, Hero Arts peace, MFT stitched rectangle and outside stitched circle
Copic Markers: Neutral Grays 0-4

Thanks for visiting today!  Follow me on Facebook, Instagram and Pinterest.  To be notified of future blog posts please sign up for email notifications.


post signature

11/10/2017

Autumn Greenery

Happy Friday!  Although I know it's getting closer to Christmas and time to mail those Christmas cards, I wanted to do one more fall card.  I love autumn and Thanksgiving so I just couldn't help myself.  Our house is the one for the big family Thanksgiving celebration and in the past we have had close to thirty people!
This card goes together quickly and by changing up the background paper it could easily be a Christmas card.  It is A2 size.  I cut a piece of vanilla card stock to 8 1/2 x 5 1/2 and scored it at 4 1/4.  It is a top fold card.
I cut two panels from the patterned paper.  The bottom piece is 5 1/2 x 4 1/4, the strip for the middle is 5 1/2 x 2 3/4.  I adhered the strip to the panel and then glued it to the card base.
Next, I die cut the pine cone from a dark and lighter brown, the greenery from various greens (I feel the variety of color adds depth - there is a light, medium and dark green), the doily from vanilla and the berry branches from white.
I used Copic markers to color the berry branches.

I glued the doily circle slightly off center, arranged all the greenery except the main leaves and pine cone, and glued then in place.  I used a sponge dauber and VERY slightly added a little color to the center of the leaf for some dimension. For the pine cone and main leaf I used foam dots to raise them up.  My last step was to add some red sequins for sparkle.

Dies: Cottage Cutz Nested Stitched Doily Set and Pine Spray

Thanks for visiting today!  Follow me on Facebook, Instagram and Pinterest.  To be notified of future blog posts please sign up for email notifications.


post signature

11/08/2017

Thanks a Latte

Hi everyone!  I'm at the Stampin' Up! OnStage Live this week.  We have a tour of the campus today and I wanted to make a thank you card for our guide.
Since it is a tour of Stampin' Up! I thought all products in this card should be theirs.  This was fun to make and a card that could be given to anyone - male or female.  After all, who doesn't love coffee?

I stamped the cup and lid with Basic Black ink and used watercolor pencils to color them.  The cup cozy is a really neat die that cuts it out and embosses it at the same time.  I also colored a cup using the new Stampin' Blends but decided I liked the mottled, painterly look of this one.

I played around a bit with the layout and paper colors but this is the one that made the cut. I'll post variations at a later date!

Stamps: Coffee Cafe, Merry Cafe
Dies: Coffee Cups, Stitched Shapes
Paper and Card stock: Painted Autumn DSP, Very Vanilla, Cajun Craze, Early Espresso, Kraft (retired SU)
Coloring tools: Watercolor Pencils - Pumpkin Pie, Early Espresso, Smoky Slate  Ink - Basic Black, Early Espresso, Chocolate Chip (coffee beans)
Extras: Regals Enamel Shapes, Touches of Nature Elements, Burlap Ribbon, Linen Thread

As you may have guessed I'm an Independent Stampin' Up! demonstrator.  I don't emphasize that here on my blog, but if you are in the market for Stampin' Up! products I'd appreciate you shopping with me.  My demonstrator website is: http://www.stampinup.net/esuite/home/mom-n-me/ (click on the "Shop Now" button.)

Thanks for visiting today!  Follow me on Facebook, Instagram and Pinterest.  To be notified of future blog posts please sign up for email notifications.

post signature

11/06/2017

Little Fishies Double Challenge

Today's card is for the CAS Colours and Sketches weekly challenge.  The challenge for the week of October 31 is a double challenge since it was the fifth Friday in October.
The challenge was both a sketch and color challenge.
The only color I actually had was the Baja Breeze card stock.  But that wasn't a problem since I could color the fish and kelp with Copic markers to match.  I originally colored the fish and decided they were too blue-red so I recolored them.  All worked for the best as I now have several fish for another project!  The fish came out a bit dark and green, but I wasn't really sure exactly what color River Rock is - I couldn't decide if it was more green or khaki.

The water is die cut and the piece below the water is dry embossed with a wave pattern (a bit hard to see in the photo.)  I had just purchased the Studio Katia water droplets and couldn't resist using them.  They aren't self adhesive and I wasn't sure what to use for glue since I wanted them to retain their sparkle.  After a couple of tries on scrap paper I decided on Glossy Accents.  It works great and you can't see it underneath.  However, a little goes a long way because if it bleeds out the side that will be seen on your card.  So use just a tiny drop!

Stamps & Die:Lawn Fawn Fintastic Friends
Wave Die: Taylored Expressions - Rolling Waves
Embossing Folder: Stampin Up! Seaside
Copic Markers: R27, R29, G85, BG93

Thanks for visiting today!  Follow me on Facebook, Instagram and Pinterest.  To be notified of future blog posts please sign up for email notifications.


post signature

11/03/2017

Working with Kuretake Clean Color Brush Pens

Happy Friday!  Today I have card that I made for my husband for our anniversary using Kuretake Clean Color Brush Pens.
It was a quick and fun card to make.  I love to color but sometimes I don't want to go into a lot of detail or take a lot of time.  This technique using the brush pens makes coloring very easy.
I stamped the dinos in a waterproof black ink and masked off the spots using a Molotow masking pen.  For the dinos I used two shades of color for each.  I colored around the edges using the darker of the two markers.  I pulled the color out just a little bit by using an aqua painter that was barely wet.  (I like to dip my aqua painter in water and use it as if it was a regular paintbrush.)  Then I used the lighter shade and blended the color out, again with the aqua painter.  The coloring goes pretty fast since the intended look is to have a sort of "halo" of color as opposed to a realistically shaded object.  When completed and dry, I used a rubber cement eraser to remove the masking pen and I then colored the dots.
For the background, I free form cut an horizon line from scrap card stock and used a Sharpie to trace it onto the background panel.  Using masking paper I cut masks and stamped several mountains.  I used the same technique as above but with only one color of marker each for the ground, mountains and sky.  One thing to note about using the browns with these pens - they have strong undertones that really come out when using water to blend them.  It doesn't show so much in the photo, but the mountains have a pink tone that came out in the blended out areas.  It still looks nice, but it something to be aware of and try out before deciding on a particular color to use.

The sentiment is heat embossed and the dinos are die cut and lifted off the panel using foam dots.

I love how this technique works well with graphic images like these dinosaurs.  It complements their cartoon feel by not being too realistically colored.  It keeps the whole card light and fun.

Stamps & Dies: My Favorite Things Prehistoric Fun
Kuretake Clean Color Brush Pens: Dinos 021 Lt. Carmine, 026 Lt. Pink, 050 Yellow, 041 Lt. Green, 045 Pale Green, 083 Lilac; Background 065 Mid Brown, 036 Lt. Blue, 046 Mid Green

Thanks for visiting today!  Follow me on Facebook, Instagram and Pinterest.  To be notified of future blog posts please sign up for email notifications.

Have a great weekend!

post signature

11/01/2017

Mermazing Mermaid


Hello!  Today I have a card made for weekly color challenge #245 (October 17, 2017) at CAS Colours & Sketches.  Mermaids are some of my favorite things to color.  They offer so many possibilities with respect to color – anything goes!

This card is pretty straightforward.  To match the challenge colors – Flirty Flamingo, Lemon Lime Twist, Night of Navy – I used the corresponding card stocks and my Copic color chart to match the colors (see the linked post for more information).


I decided to use the coral color for her hair and stick with an actual person color for her body, but I did think about making her blue or green.  In the end I thought she might look sickly or cold!  I coated her tail in several coats of Wink of Stella.  And although I colored several accessories I ultimately did not use the turtle.

The background is stenciled with blue ink and the panel is mounted on a green glitter card stock base.  It is difficult to adhere anything to glitter paper; in order to do so I cut a rectangle from the center of the green glitter paper and stuck the resulting frame to the card.  Then it was easy to use foam tape on the back of the mermaid panel to put it on top.

Stamps and dies: My Favorite Things Mermaizing and MFT Tag Builder Blueprints 5
Copic markers: Flirty Flamingo R14, R12, R00; Lemon Lime Twist YG03, YG01, YG 00; Night of Navy B32, B34, B32

Thanks for visiting today.  Follow me on Facebook, Pinterest and Instagram. To be notified of future blog posts, please sign up for email notifications.


post signature