9/29/2017

Booyah! Window Peeker Card

I wasn't quite sure what to call this card - it's not really a frame and if I called it a window card it sounded like it should use a die that looks like a window.  I decided on window peeker since the images "peek" out from window flaps.
I've had both the stamp set and die for a year and never used either.  Since the sketch challenge at CAS Colours & Sketches this week uses three vertical elements I thought I'd give this a try.  The die has three squares and only cuts three sides leaving a flap for a surprise inside.
The ghosts in this set come without faces - you can pick and choose from several expressions.  And you can dress them up in costume.  You can see I was thinking about making one a pirate.  It was fun just to sit and color last night.  And these colored very quickly.
For the inside backgrounds I used three colors of distress oxide inks and sprayed them with water to get some extra texture.
I used a stitched rectangle that is slightly smaller than the A2 card and the stitched window die. (Since it has three rectangles so there was no need to measure. Yay!)  I used foam tape to pop the front off the base of the card so that I could tuck my ghosts in their frame.

When the card is closed you can just see some of the ghosts peeking out from behind their flaps, and it is fairly plain, so I added a few sequins.  I'm enjoying making Halloween cards this year so you may see a few more with this set - it really is quite fun.

Stamps: Lawn Fawn Booyah!
Dies: Lawn fawn Booyah!, MFT Blueprints 15, MFT Window Flap dies
Ink: Distress Oxide Twisted Citron, Spiced Marmalade, Seedless Preserves
Copic Markers: V000, V01, V12, V15, V17, Y000, YG11, YG13, YG17, N0, N1, N2, N4, N5, N7, R21

Thanks for visiting!  Follow me on Facebook, Pinterest and Instagram.  (And don't forget to sign up for email notifications of new posts!)


post signature

9/27/2017

Franken-bird!

I love Tim Holtz's crazy bird stamps.  A few years ago you saw them everywhere - well I still adore them and wish I would see more of them again!  They always make me smile.
I created this card a while back, but I wanted to share it here.  To make the bird into Franken-bird I added the neck bolt, stitches and hair with a Copic friendly Multi-liner pen.  One fun thing about the sketchy style of these stamps is that you can add details and have them look like they are part of the original stamp.  A great way to make your card unique.

Next  I colored him with Copic markers and cut him out with the matching die.  For the background I used purple Brushos to get the watercolor splash and then stamped the sentiment in Staz-on ink.  After the background was finished and dry, I glued the bird onto the card.  It still needed something so I added the sequins.

Stamps: Tim Holtz Bird Crazy, Tim Holtz Crazy Words
Ink: Memento black, Multi-liner, Brushos, Staz-on black, Copic markers

Thanks for visiting!


post signature

9/25/2017

Another Fall Scene with Copic Markers

Good morning everyone!  My card today features another fall scene - this time from My Favorite Things.
The background is watercolored in yellow, orange and red; I then used a sponge dauber to add the green grass.

The girl and some background leaves are colored in Copics; the girl is popped off the background using dimensionals and her edges are lightly sponged with crushed curry. It's hard to see in the photo but I added texture to her hat and mittens by spraying a terrycloth rag with colorless blender solution and dabbing them with it. Finally, I die-cut a few leaves and added those and the sequins.

Stamps - MFT Thankful Friend, MFT Essential Sentiments 
Dies - MFT Die-namics Thankful Friend and Stitched rectangle
Ink - Stampin Up! crushed curry, cherry cobbler, garden green, pumpkin pie
Copic markers - Hat YR15, YR17, YR19, YR24, YR27; Sweater YR01, YR04, YR15, YR18, YR27; Pants G28, YG63, YG67; Rake R27, R29, R39, R59; Shoes E29, E39, E59; Skin E000, E00, E11; Hair E18, E39

Thanks for visiting and remember to sign up for email notifications of new posts. Follow me on Facebook, Instagram and Pinterest!


post signature

9/22/2017

Happy Fall Y'ALL!!!

I think the title says it all!  Fall is here and I love it - my favorite season!

It's been quite a busy week at work so I regret that I didn't have a post on Wednesday - I hope this card makes up for that and offers some inspiration.
This card seemed perfect for the autumnal equinox and needs little explanation.  The image is colored with Copic markers.  I picked out the paper first and colored it in coordinating colors.

Tiny Townie Patricia loves Pumpkins by Stamping Bella is one of my favorite stamps - I may have to color another soon!

Thanks for stopping by - I hope you have a creative weekend!

post signature

9/18/2017

Easy All Occasion Card

Happy Monday!  Today's card is a super easy CAS card that I made for this week's sketch challenge at the CAS Colours and Sketches challenge blog.
Here is the sketch this week:
I did veer away a bit from the sketch and added a strip of patterned paper down the side to add a little color.  The front of the card is adhered using foam tape for dimension. Elements like this add just enough interest without cluttering the card.  I used two stamp sets - Lawn Fawn's Scripty Sayings and My Favorite Things Fly-By Friends. 

The card went together very fast and you could easily make this for numerous occasions since the sayings set comes with all the basics - thank you, happy birthday, etc. The style of this script set goes very well with the casual, cute style of many of my stamps, but can also work with stamps that are a bit more formal. The MFT Fly-By Friends also has a cute ladybug, bee and some flowers; all in two sizes making it a very versatile set. 
I made two of these and embellished one with some Nuovo Drops.  If you look closely at this photo you will see the orange and yellow dots sprinkled near the grass and dashed trail.

I stamped everything on mixed media paper with MFT black hybrid ink and colored with Zig Kuretake markers.  Two things made this card go together quickly - the coloring is very loose and minimal and my MISTI.  If I had only made one it wouldn't have made much of a difference, but when making multiples it's a real time saver.  And because this card is so quick to make, I'd definitely suggest making multiples to have on hand.

Thanks for visiting today!

post signature

9/15/2017

Just Treats! Treat Bags

I love Halloween!  Well, actually I love the cute Halloween decorations and the candy and the trick-or-treaters.  I'm not much for the really scary stuff.  So today I thought I'd share some treat bag tags that feature adorable cupcakes!
 
Wouldn't these be perfect party favors or to hand out to special trick-or-treaters? Even if you don't have little ones, these make fun treats.  I don't have small children anymore, but love making treat tags, bags and holders to give out at my Bunco group around holidays.  (I think I know what they'll be getting in October!)  And these would be perfect for co-workers. 
I die cut the cupcake pieces from the Spooky Cupcakes die, the bats from the Halloween Pedestal die and the two largest tags from the Mail Tag Set.  When making multiples of things I use plastic containers or a muffin tin to organize my pieces.  I put all the die cuts for one card or tag in one container or muffin cup.  It really keeps things organized!
I laid the smaller tag on top to get the placement of the sentiment correct and then I heat embossed it underneath.  Afterwards I glued the smaller tag to the larger one.
For the cupcake itself, I used two shades of brown and shaded the sides with a sponge dauber and Chocolate Chip ink.  Then I assembled the cupcakes and glued them to the tags.  For the batty cupcake I added some sequins.

Dies - Cottage Cutz Spooky Cupcakes 2, Halloween Pedestal, Mail Tags Set
Stamps - Lawn Fawn Howl-O-Ween 

Have a great weekend and I hope I've inspired you to do something creative!

Thanks for visiting and  remember to sign up for email notifications and follow me on Facebook, Instagram and Pinterest!

post signature

9/13/2017

Floating Image Window

Sorry I'm a bit late posting today.  I went to a concert last night and today was incredibly busy at work.  I made today's card for my daughter's birthday this past weekend.  I got the idea for the floating window from Jennifer McGuire who made some great shaker cards using tulle.
My daughter (an adult believe it or not) loves her footie, onsie pajamas.  So when I found this stamp set from Simon Says Stamp it immediately reminded me of her.  I stamped the bear and her PJs, then colored both with Copic markers.  The PJs are actually stamped on pink cardstock and colored.  I did this so I could use blending solution to get texture.  I took a piece of terry cloth, wet it with solution and dabbed it on the colored PJs.  This gives them that fluffy look.  I really only colored the face of the bear in detail since that is all you see, but I still colored the rest of her without shading so that if you catch a glimpse of her from the side you see that is is colored.
The inside of the card has her backside.  This set is adorable and is perfect for this window.

To create the  window I ran both the front of the card and a panel cut to A2 size through the Big Shot at one time.  The die cut the window in the panel and left an impression on the front of the card.  Then I lined up the die in the impression and ran that through the Big Shot.  In retrospect, I think I should have die cut the front, then die cut the window on a panel larger than the front.  It would have been easy to line up the windows and then trim the front panel - live and learn for next time!

After I cut the window I used white tulle for the substrate (never thought I'd use that word on a card blog - I've been married to an engineer for too long) and adhered it with strong tear and tape.  I tried snail adhesive but that wasn't sticky enough for the tulle.
It's hard to see the tulle in this photo but it's there.  I then used the same tape to glue the top panel on to the front making sure to line up the windows.  The bear was glued together using the tape, and her PJs were put on with foam dots.

This stamp set is so perfect for this type of card.  It comes not only with the backside of the PJs but the back side of the bear too!  I've seen a few other stamp sets that include front and back but if you don't own one, you could just color the front and die cut a solid color piece for the back of the stamp. 

Stamps - Simon Says Stamp Bear Necessities, Simon Says Stamp Happy and Smile (sentiment front), My Favorite Things Whimsical Greetings (Happy Birthday)

Follow me on Instagram, Pinterest and Facebook.  Sign up for email notifications to be notified of future posts.

Thank you for visiting! 


post signature

9/11/2017

Foxy Friends - I Heart Fall!

Good morning!  Today's card is in anticipation of my favorite season - fall!
I've had this stitched die for quite some time and never used it.  I wanted this to be a clean and simple card so I was a little hesitant to use the die thinking it might be too much.  However, with the frame in white it blends into background and adds interest without cluttering the card.  (And it allowed me to use those adorable mushrooms!)

The MISTI made this card very simple to layout.  I traced the inside of the frames on an A2 piece of computer paper and used that to position the stamps where I wanted them.  I cut my piece of card stock the same size and was then able to easily stamp the images in the perfect place for the frame.

I used Tangerine Tango, Almost Artichoke and Fresh Fig since these are the colors for the CAS Colours & Sketches challenge this week.  Because I used kraft paper for my background they stamped a little bit darker.  To get the fox to pop, I used a white Prismacolor pencil to color his face, chest, ears and tail tip.

I glued the kraft panel to the stitched and used foam dots to lift it off the card.  Finally I added the wood leaf and some linen thread.

Stamps: Stampin Up! Foxy Friends; Lawn Fawn Into the Woods (sentiment)
Inks: Stampin Up! Always Artichoke, Fresh Fig, Tangerine Tango
Dies: MFT Blueprints 29

Don't for get to sign up for email notifications of posts and follow me on Instagram, Facebook and Pinterest!

Thanks for visiting!


post signature

9/08/2017

Stop and Smell the Flowers!

Today's card features some of my favorite things - hummingbirds, roses and Prismacolor pencils! This is such a delicate image the pencils were perfect!

This is an A2 side fold card.  A bit unusual for me but it worked well with the stamps and dies.
I picked out the patterned paper first and then matched the colors for the rose to it.  Since roses can be almost any color, this was easier than trying to find a coordinating paper AFTER I colored the image. I used Copic markers under the colored pencils. (I'll have another post later on with coloring tips for colored pencils.)
Next I die cut the foliage from the Fancy Doves with Vine die set and glued it directly to the card.  I then die cut the bird and roses.
I tied the ribbon on the bottom of the die cut and popped it off the card using foam dots.  I used a small glue dot to adhere the ribbon to the die cut.
My next to last step was to add the sentiment. I decided to rip the edge of the sentiment strip to give it a more organic feel.  A tip for this - score where you want to tear first.  Your tear is more controlled this way.  The last step was to add sequins.  I almost forgot them, but you can see them in the first photo.  This card called for a little bling!

Dies used - Cottage Cutz Hummingbird and Roses, and Fancy Doves with Vine

I hope you enjoyed today's card.  This is such a pretty stamp and die set - I had so much fun coloring it and creating this card!  I'm a guest designer until the end of December at Cottage Cutz - they have great dies (and some stamps sets too).

Don't forget to sign up for email notifications of posts and follow me on Instagram, Facebook and Pinterest!

Thanks for visiting! 


post signature

9/06/2017

Creating a Frame from a Window Die

Happy hump day!  Wednesday is coming early this week - I love it!  Today's card features stamps from Taylored Expressions.  TE is celebrating their ninth birthday with a sketch challenge and I love challenges - so here is my entry!
These little guys reminded me a a family photo so I just had to use the "smile!" phrase.  When designing this card I already had the basic layout because of the sketch:
but I wanted to do something a little different.  While sticking to the basic layout I wanted to add some whimsy since the critters in the image are so adorable and goofy.  I decided to go with an odd shaped frame instead of the circle.  Except I didn't have an odd frame die, I had a window die.
The die made a wacky shaped stitched window.  The stitching actually made it easy to convert to a frame.  I lined up the stitched lines with the bar on my paper cutter and cut about 1/16 inch away from the stitching.
I could have created the frame with my paper cutter, but it would not have had the stitch lines (a look I like) and it would have been more difficult to cut out!

It was fun picking out the paper. In the end I used the same tone-on-tone colors and just altered the patterns for my two layers.  Since the animals are neutral any color would have worked but I really loved this yellow.  I felt is just went with "smile!" and it didn't detract from the focal point of the critters.  I used Cottage Cutz "Wacky Stitched Rectangle die" for the bottom layer so the informal geometric was picked up.  If you look closely the large layer has some uneven stitching on it.

The dots were in the sketch and I used quite a few here.  I had yellow, white and grey enamel dots that all worked well but the grey definitely stood out the most.  I like asymmetry and I thought these gave the card a nice weight on the right side without being unbalanced.

Stamps - Taylored Expressions "If Dog Could Talk" and "If Cats Could Talk"
Copics - Dog E30,E31, E33, E35, E37, E39, R21; Cat N0, N1, N3, N5, N8, R21; Mouse W0, W1, W3, R21
Paper - My Favorite Things Daffodil, Painted Prints Citrus, Neenah Solar White
Dies - Cottage Cutz Nested Wacky Stitched Rectangle, MFT Wacky Window
Enamel Dots - W Plus 9

Don't for get to sign up for email notifications of posts and follow me on Instagram, Facebook and Pinterest!

Thanks for visiting! 


post signature

9/04/2017

Flamingos!!!

Good afternoon!  I'm a bit late today - very busy weekend.  My card today is for the double challenge at CAS Colours and Sketches.  It was both a sketch and color challenge.  I did not have the exact pink they called for but substituted one that was close.  I was tempted to add more details to this card but time constraints did not allow for that.
The colors were a light blue, light green and pink - we could add neutrals so I added the soft beige.  The flamingos are shaded using the shading technique I described last week.  When stamping over the an image of the same color, the color will appear darker and that is how the wings came out darker - they were simply stamped twice.  I shaded the back of the tails and the heads.

I masked off the flamingos and added the tree behind.  I had originally intended for the frame around the birds to be white, but I accidentally used my frame die to cut the flamingos.  I forgot it was a frame and thought I was cutting a scalloped circle.  This just provided the opportunity to do a bit of redesigning! I decided to cut four scallop frames and layer them under the frame with the stamping.  I think I may like having the image on part of the frame better than if I just had a solid frame.  Sometimes accidents work for the best!

I masked off the stripe on the left and used a background stamp to create the weave pattern in blue.

I may go back and add a few details to the card - some wink of stella and perhaps a few nuovo drops.  I'll post a photo if I do for comparison.

Ink - Stampin' Up! Certainly Celery, Bashful Blue, Powder Pink and Sahara Sand
Card stock - Neenah Solar White, Certainly Celery
Stamps - My Favorite Things Flamazing
Dies - MFT Stitched Scallop Frames

Don't for get to sign up for email notifications of posts and follow me on Instagram, Facebook and Pinterest!

Thanks for visiting! 

post signature

9/01/2017

Latte Card with Die Cuts

Good morning!  I hope you all had a great week and are looking forward to the long weekend.  One extra day to craft!  September always puts me in the mood for fall (even though technically it doesn't start for a few weeks and it was in the 90s today!) so today's card has some fall colors.
This card features the adorable Mr. Snuggles die from Cottage Cutz along with the Cup of Latte die and Nested Stitched Eyelet Rectangle Set.  I love that you can move Mr. Snuggles arms to pose him various ways!
While I love to color I also love making cards with only dies (or mostly dies, this has a stamped sentiment) - they always look so polished.

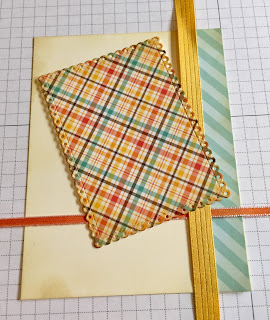
When designing this card I picked a stripe and plaid that I felt worked well together.  Normally I wouldn't use these two types of patterns together but the scale of these are different and the blue in the stripe is picked up in the plaid.

My card base was cut from dark brown cardstock to 4 1/4 x 11 and scored at the 5 1/2 inch mark to make a top folding A2 card.  I used vanilla cardstock for the front panel and cut it to 4 x 5 1/4.  I die cut a panel from the plaid paper using the largest of the Stitched Eyelet dies and I cut a panel of the striped paper 3/4 x 5 1/4 inches.
I used a sponge dauber and distress ink to color the sides of the bear and cup.  When coloring the cup I used both the Gathered Twigs and Evergreen Bough Distress Ink.  Then I cut the "latte" and steam from the same striped paper. His eyes are colored in with a multi-liner pen.  Shading the edges of the dies give them extra dimension and pop.
After I glued the striped panel to the front I distressed the edges with Antique Linen Distress Ink.  I also distressed the edges of the plaid panel.  I used ribbon to mimic the plaid pattern on the front panel,
and I added the sentiment underneath.  The sentiment is embossed in copper on dark brown cardstock cut to 1/2 x 4 inches for the sentiment.
When all the panel elements were glued down, I adhered it to the card with foam strips.  I then added the bear and cup with foam dots.

Thanks for stopping by today - I hope you have time this long weekend to be creative!

Dies used - Cottage Cutz Mr. Snuggles, Cup of Latte, Nested Stitched Eyelet Rectangle
Cardstock - Stampin' Up! Early Espresso, Very Vanilla
Inks - Distress Inks Antique Linen, Gathered Twigs, Evergreen Bough, Victorian Velvet
Stamps - My Favorite Things Stay Cool

Thanks for  visiting!  Don't forget to sign up for email notifications of new posts and follow me on Facebook, Instagram and Pinterest!


post signature