3/08/2021

Tiki Hut Birdhouse

What's more fun than a tiki themed card? One that's shaped card (always impressive) and has a surprise element (always fun)!

I used the Stamps of Life 5 x 7 Birdhouse Fold-It die as the base.  The Fold-It dies allow you to easily make shaped cards.  Most fit in A2 envelopes but this one is a bit larger.  The die creates a regular birdhouse which can be decorated for any occasion. I went tropical with mine.

Two items that make this extra special - the fun, handmade sign and the surprise parrot. For the sign, I stamped "aloha" on vanilla cardstock and then free-styled the sign.  I used snips to cut it out, not being super careful because I wanted it to look weathered.  After inking the edges I folded some "planks" and inked along those edges to make it look like wood.  Then I hung my sign using twine so it swings.

For my surprise parrot I used the Peek-a-Boo Round die.

It took some planning for this as the Peek-a-Boo die will across separate panels of the house.  These are all separate pieces that get glued next to, not on top of one another when you attach them to the card base.  But you need to cut the Peek-a-Boo flap before gluing the panels to the base.

To accomplish this, I flipped them over, lined them up and very carefully used thin double sided tape (I use Tear & Tape) to keep them together including the hole.  I left the backing on the tape and ran the taped panel through my die cutter.  I used the "PEEK" die at the same time so I would have that word in negative.  (I did not want to glue down those tiny letters!)

Then I cut out another Peek-a-Boo flap from scrap cardstock.  I clipped it off, trimmed it slightly smaller and adhered it to the underside of the flap on my birdhouse.  You can see that this gives a nice finish to the underside of the flap.  You don't see my tape and from the front you can read the word.

I stenciled the house using Distress Oxide inks to give it a vintage Hawaiian feel.  I was trying to get a thatched grass look.  I also edged the die cut flowers and leaves in colors close to the cardstock colors for a bit of depth.

I hope you've enjoyed my card today!  I love hearing from you, so please leave a comment below.

Products used:

  • Birdhouse: The Stamps of Life Birdhouse 5 x 7 Fold-It
  • Stamps: TSOL Tropical2stamp (aloha); Morebirds2stamp (parrot)
  • Dies: TSOLTropical2stamp matching dies, Peek-a-Boo Round Set
  • Inks: Distress Oxide Vintage Photo, Ground Espresso, TSOL Tangerine, Sunshine, Guava, Green Apple
  • Cardstock: TSOL, Gingersnap, Guava, Tangerine, Sunshine, Lemonade, Green Apple, Kiwi
  • Copic Markers (parrot): Y13, Y15, Y19; YG11, YG13, YG17; RV02, RV06, RV09; E59

Thanks for visiting! Click here to sign up for email notifications of future posts (you will be sent an email to verify your address - don't forget this step).  Follow me on Instagram, Pinterest, Facebook and Bloglovin'


post signature

3/04/2021

St Patrick's Day Box Card

My mother always celebrated St. Patrick's Day in a big way.  She had Irish ancestry and was very proud of that.  As a result I now put out decorations, cook corned beef and cabbage and celebrate the day.  Since  green is one of the choices on this week's Tic Tac Toe challenge I knew I had to make a St. Patrick's card.

Here is Tenia's board.  I chose Green, Sequins, Heat Embossing.

Although this could be mailed, I will keep this card.  I love making box cards both to give and to keep as decorations for a holiday.  This one will go up with my other St. Pat's things.

Here are a few other images:


I colored the leprechaun and pot of gold with Copic markers.  The shamrocks are all die cut. To make it look like some were flying up out of the card, I glued some to an acetate strip.

I wanted a bit more color than green, so I used a multi-color paper on the inside panels (it would have been so easy to just do more green) and then cut flowers in orange and pink.  To complete the challenge, the sentiments are heat embossed in gold and I used gold sequins as a substitute for gold coins.

Products used: 

  • Stamps: The Stamps of Life (TSOL) Leprechaun2stamp
  • Dies: TSOL Leprechaun dies, Shamrocks4us dies, Mini Flower dies, Box Card die
  • Paper: TSOL Thanks Collection, TSOL Green Apple & Kiwi, dark green scraps
  • Markers: Copic markers
  • Accesories: Ribbon, gold embossing powder

Thanks for visiting today! Click here to sign up for email notifications of future posts (you will be sent an email to verify your address - don't forget this step).  Follow me on Instagram, Pinterest, Facebook and Bloglovin'


post signature

3/03/2021

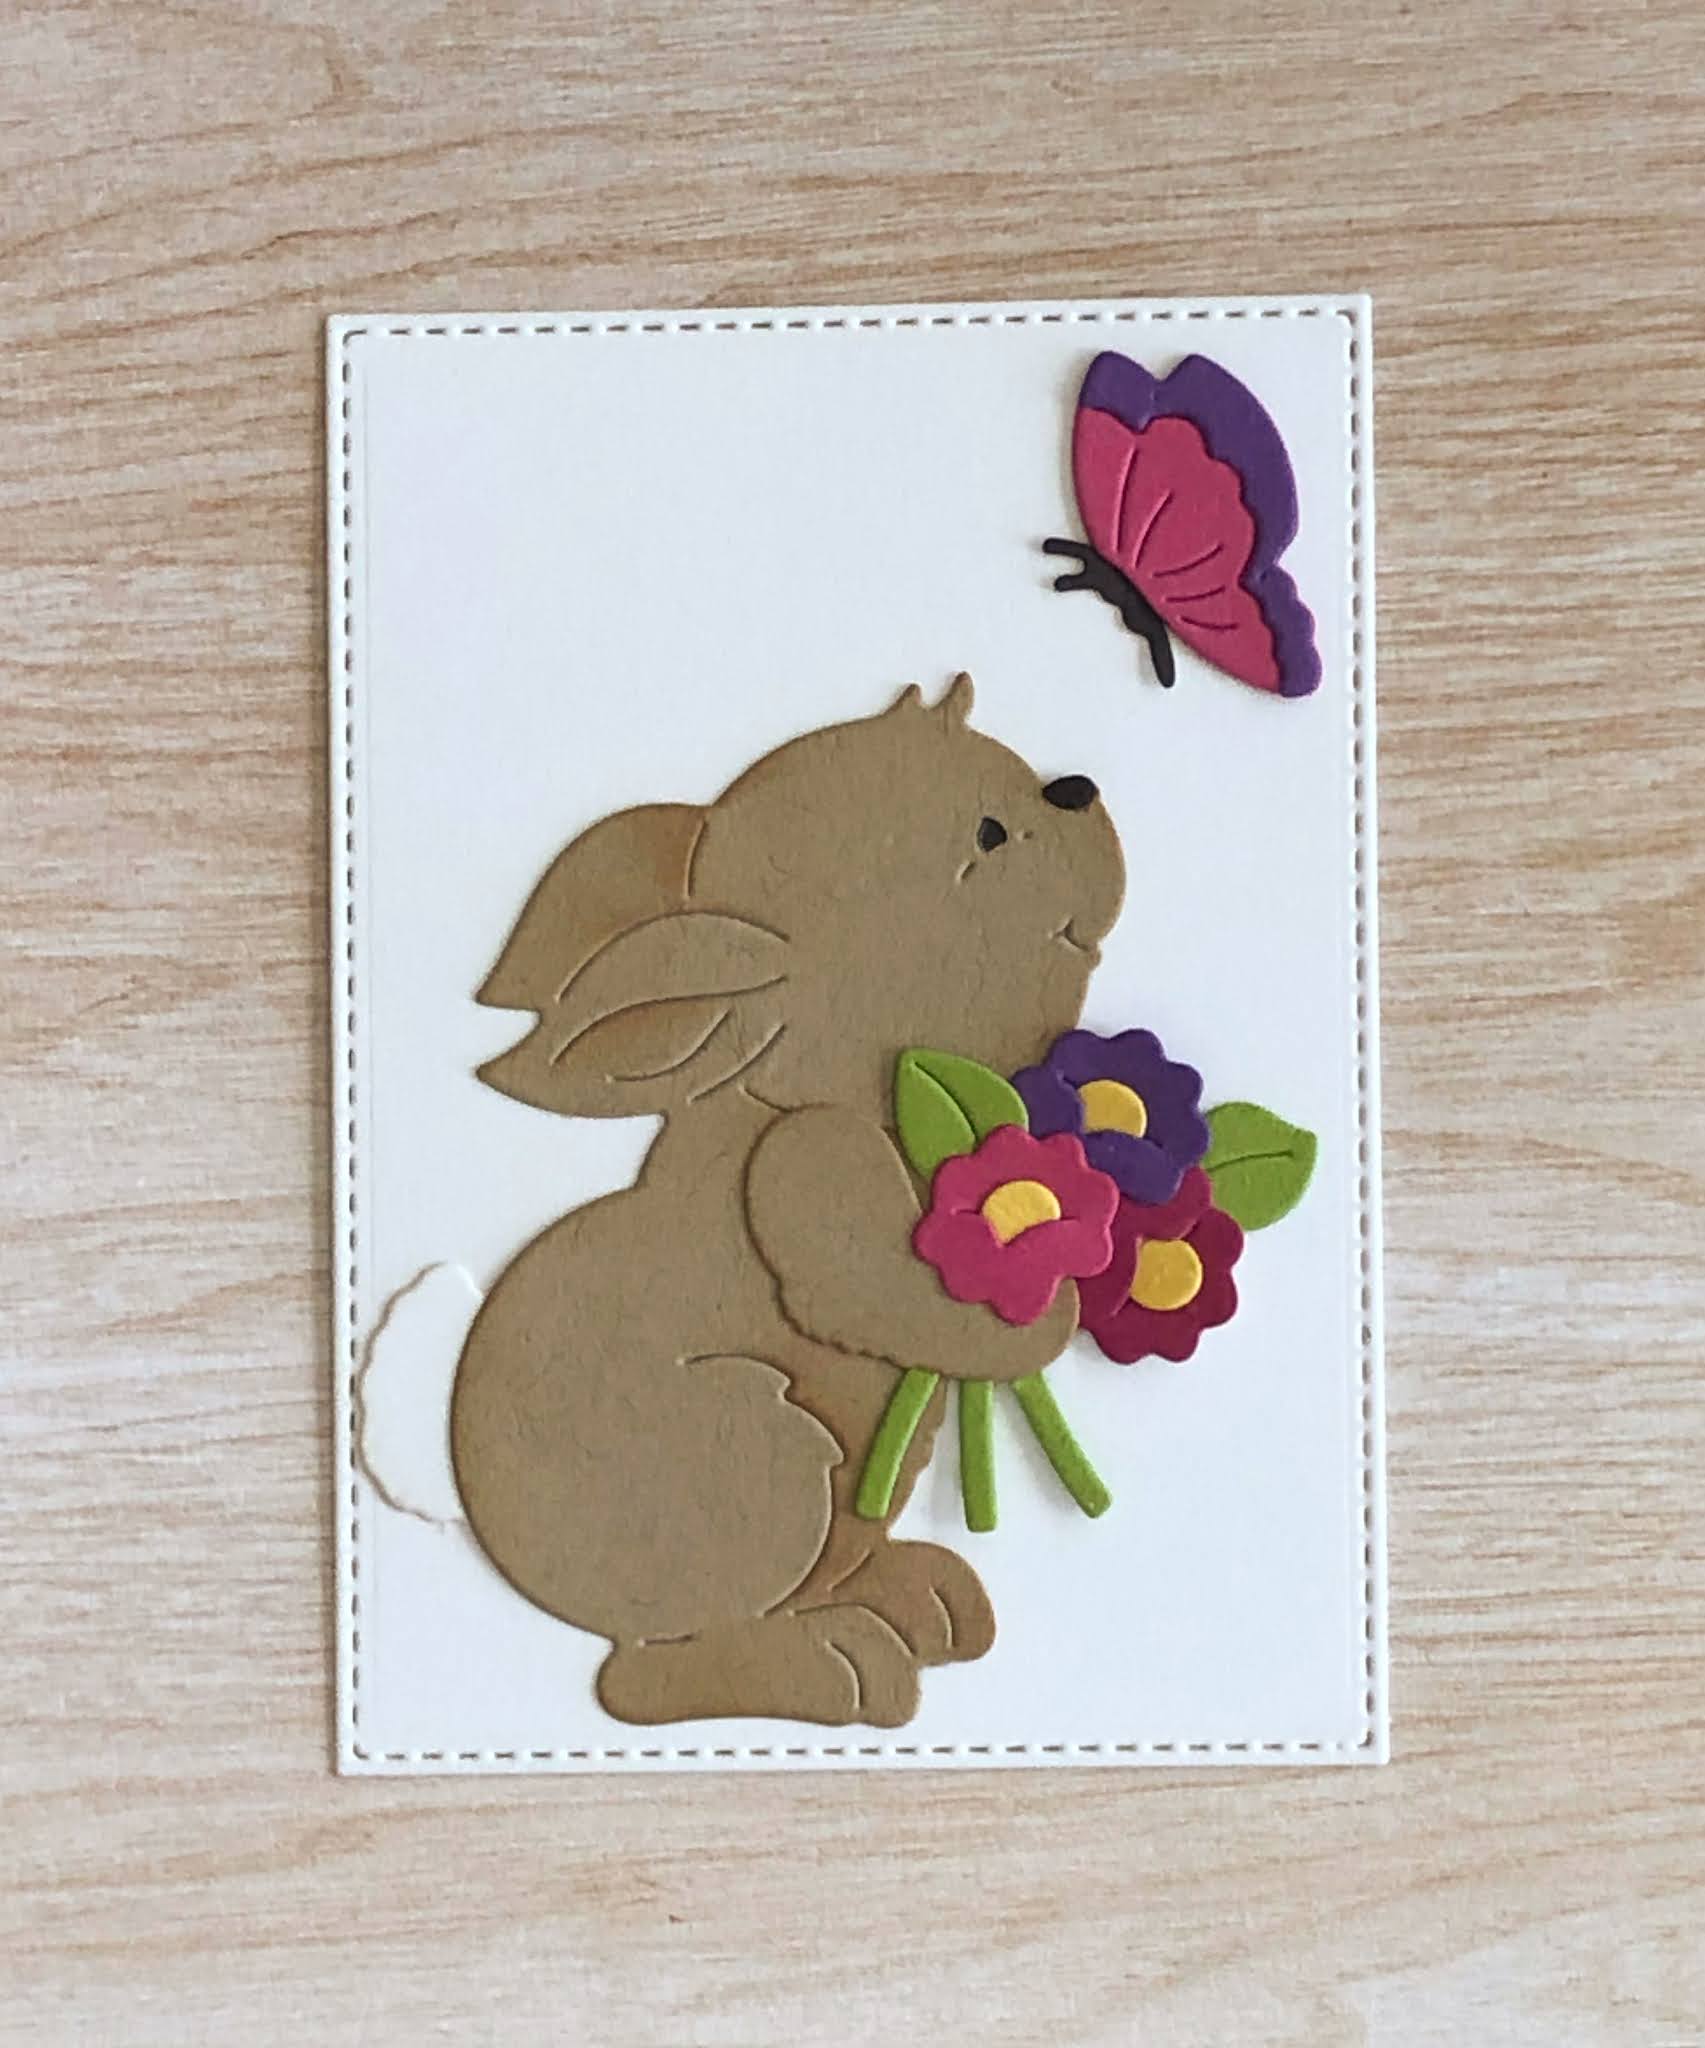
Hello Spring!

I have a quick card today for the sketch challenge this week at Splitcoaststampers.  This adorable bunny is all die cut and features a die from the new release at Cottage Cutz.

This card is very simple to create.  I started with a sketch from Splitcoaststampers.


I decided to use a ribbon for the horizontal stripe across the top.  Tying that bow was the most difficult part of the card for me!  LOL!  (Confession - I'm not good at tying bows.)

I had some decisions to make with the sentiment.  The purple that matched my ribbon seemed too dark and the white was a bit light and blended in too much with the background.  I decided to stack them.  I used two layers of the purple below the white.

That gave just enough "shadow" to make the sentiment visible but not overpowering.

I hope you have enjoyed my card today.  It was quick to put together (other than that bow!) and the bunny is adorable and so ready for spring.  It made me happy to create something so "sunny".

Products used:

  • Dies: Cottage Cutz Bunny with Butterfly, Hello Spring Bloom, Stitched Rectangles
  • Cardstock and paper: TSOL Kiwi and patterned paper.  Scraps
  • Ribbon: Stampin' Up! Gorgeous Grape

Thanks for visiting today! Click here to sign up for email notifications of future posts (you will be sent an email to verify your address - don't forget this step).  Follow me on Instagram, Pinterest, Facebook and Bloglovin'


post signature

3/02/2021

Color Challenge Tuesday

Happy Tuesday.  It's a new month at CAS Colours & Sketches and we have a new hostess - YoonYoung.

She gave us some very sophisticated colors for her first color challenge.

I struggled a bit at first but in looking over my stamps, this image seemed perfect for the colors.  It was super simple to create.  I used markers on an acrylic block and a blender pen. I love this technique for small "watercolor" images.

The card is pretty straightforward.  It's a CAS challenge so I couldn't add much to the card, but I do like to add the simple layer over a card base which I have lightly embossed.  To me, this adds a bit of interest while keeping the card clean.  Since I had iridescent sequins in Terracotta Tile, I used one for a bit of sparkle.

Products used:

  • Stamps: Stampin' Up! Touched My Heart, Stampin' Up! Band Together
  • Ink: MFT Hybrid Licorice, Stampin' Write Markers Terracotta Tile, Calypso Coral, Granny Apple Green
  • Accessories: MFT Stitched Rectangles, Stampin' Up! Subtles Embossing Folder, Blender Pens

Thanks for visiting today! Click here to sign up for email notifications of future posts (you will be sent an email to verify your address - don't forget this step).  Follow me on Instagram, Pinterest, Facebook and Bloglovin'

post signature

3/01/2021

TSOL Card Kit Dragonflies Slimline Card

This evening I have a card made using the February card kit from The Stamps of Life.  I'm not a kit person (usually) but I have made an exception here.

I have the coordinating stamp and die sets from their Die Hard Club, so when the kit came out with additional stamps and dies, plus paper and embellishments I couldn't resist.  It seems dragonflies are everywhere recently, but I find these ones particularly cute.

TSOL kits come with an idea card, but they are not the "this kit makes these 12 cards" type of kit.  More of a "here's what you could do" kit.  No card bases, no instructions - just coordinating products, cardstock and some ideas.  This card kit has made me a fan of kits!

The colors were so close to the colors for this week's Splitcoaststampers challenge colors I decided to use the kit and my dies.  No coloring here - I cut the dragonflies from the patterned paper.

The most time consuming part was deciding on the design.  I used two of their slimline dies for my layout.

This will be going to a close friend who also makes cards.  But she has limited space and time, and will NOT color a card - she hates it.  Everything is die cut or punched out with the occasional sentiment stamped.  Her birthday is later this month and I know she will appreciate this card!

Products used:  All products The Stamps of Life

  • Dies: Dragonflies2stamp, Moredragonflies2stamp, Scalloped Slimline Card set, Stitched Square Slimline Drop-in
  • Cardstock: Guava, Sunshine
  • Paper: Take it Easy (Kit)
  • Embellishments: Take it Easy (Kit)

Thanks for visiting today! Click here to sign up for email notifications of future posts (you will be sent an email to verify your address - don't forget this step).  Follow me on Instagram, Pinterest, Facebook and Bloglovin'


post signature